Set Up Your Bike
Pick your bike. The steps below change to match it. Guided Setup in the SmartSpin2k Companion App covers these same steps on your phone.
Before you start
- Everything in the box: SmartSpin2k, arm, bike mount, knob insert, shifter, breakout cable, power adapter, O-Rings and velcro straps.
- A phone with the Companion App installed.
- Your bikepower meter, awake and not connected to another app.
- In the box: SmartSpin2k, arm, bike mount, knob insert, shifter, breakout cable with the Peloton Sensor and Peloton Tablet connectors, power adapter, O-Rings and velcro straps.
- A phone with the Companion App installed.
- A small flat screwdriver for the cable retention clip on the back of the Peloton tablet.
- A decision on Tablet Mode or Headless Mode. Part 2 explains both.
- Tablet Mode: keep taking Peloton classes on the tablet, or run the Grupetto overlay.
- Headless Mode: SmartSpin2k reads the bike on its own. The Peloton tablet is not needed for rides.
- The parts from the box: SmartSpin2k, arm, bike mount, knob insert, shifter, breakout cable, power adapter, O-Rings and velcro straps.
- A phone with the Companion App installed.
- One power source: the Bike+ tablet with Grupetto installed (Part 4 covers installing it), or power meter pedals fitted to the bike.
Part 1 · Install the hardware
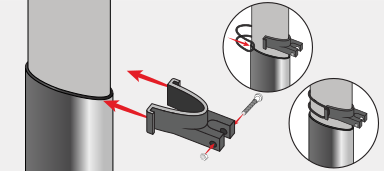
Assemble the bike mount with the nut and bolt. Attach it to the front tube of your bike with the O-Ring or the velcro straps.
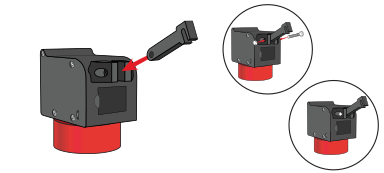
Attach the arm to your SmartSpin2k with the included nut and bolt.
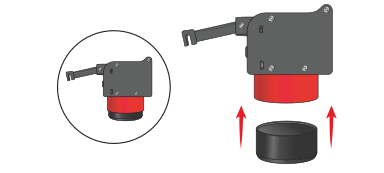
Press the knob insert into the bottom of your SmartSpin2k.
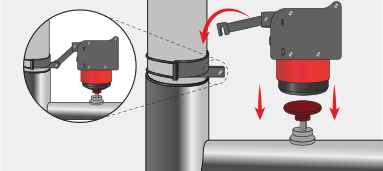
Place your SmartSpin2k over the resistance knob of your bike. Latch the hook on the arm into the bike mount from step 1.
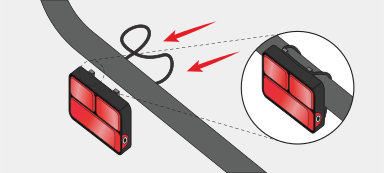
Strap the shifter to your handlebar with the included O-Ring. Place it where your hand reaches it while you ride.
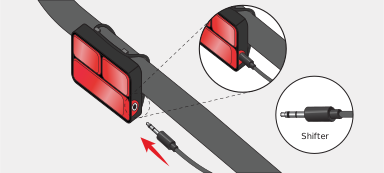
Plug the Shifter connector into the jack on the shifter.
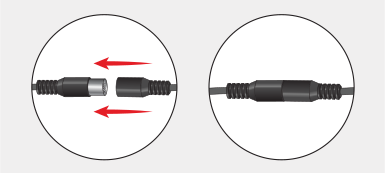
Plug the Power connector into the power adapter, then plug the adapter into the wall. Connect the large breakout cable to your SmartSpin2k. The LED lights turn on.
Part 2 · Connect the cables
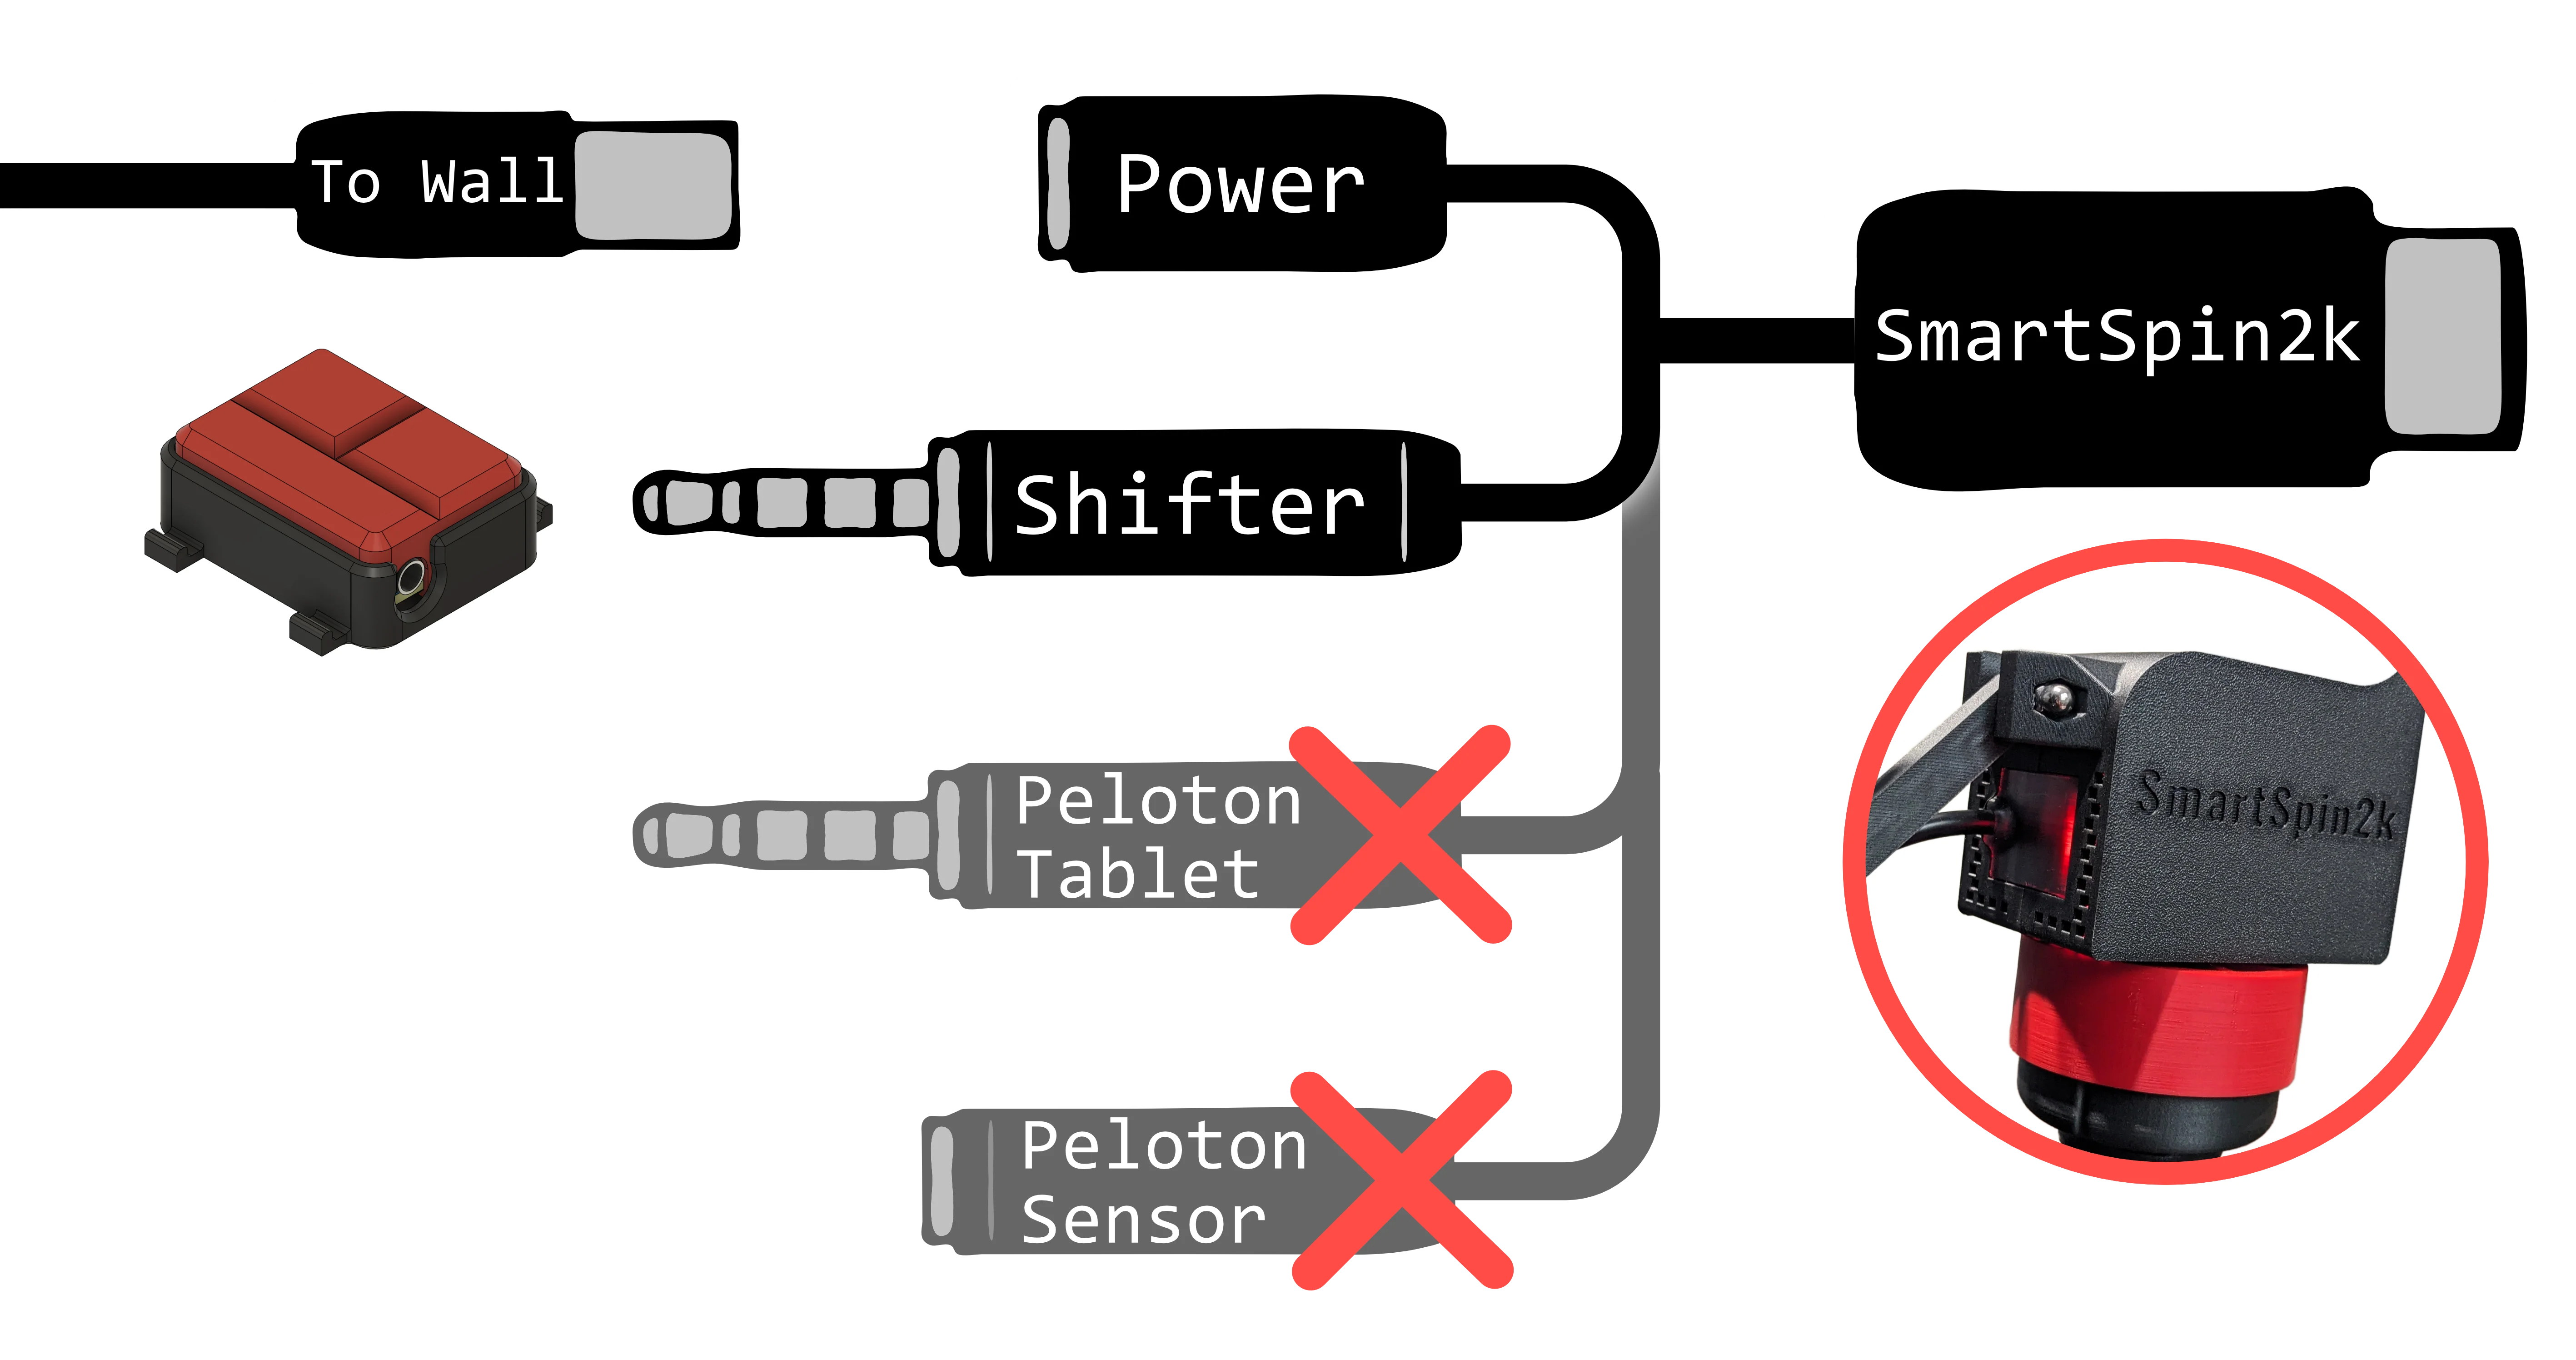
Plug the Power connector into the power adapter and the Shifter connector into the shifter. Leave the Peloton Tablet and Peloton Sensor connectors unplugged.
Plug the Power connector into the power adapter and the Shifter connector into the shifter.
Do not connect the cables labeled Peloton Sensor or Peloton Tablet to your bike. These wires are intended for the original Peloton Bike and should not be connected to the Bike+.
The switch on the side of the SmartSpin2k does nothing for your bike. Leave it where it is.
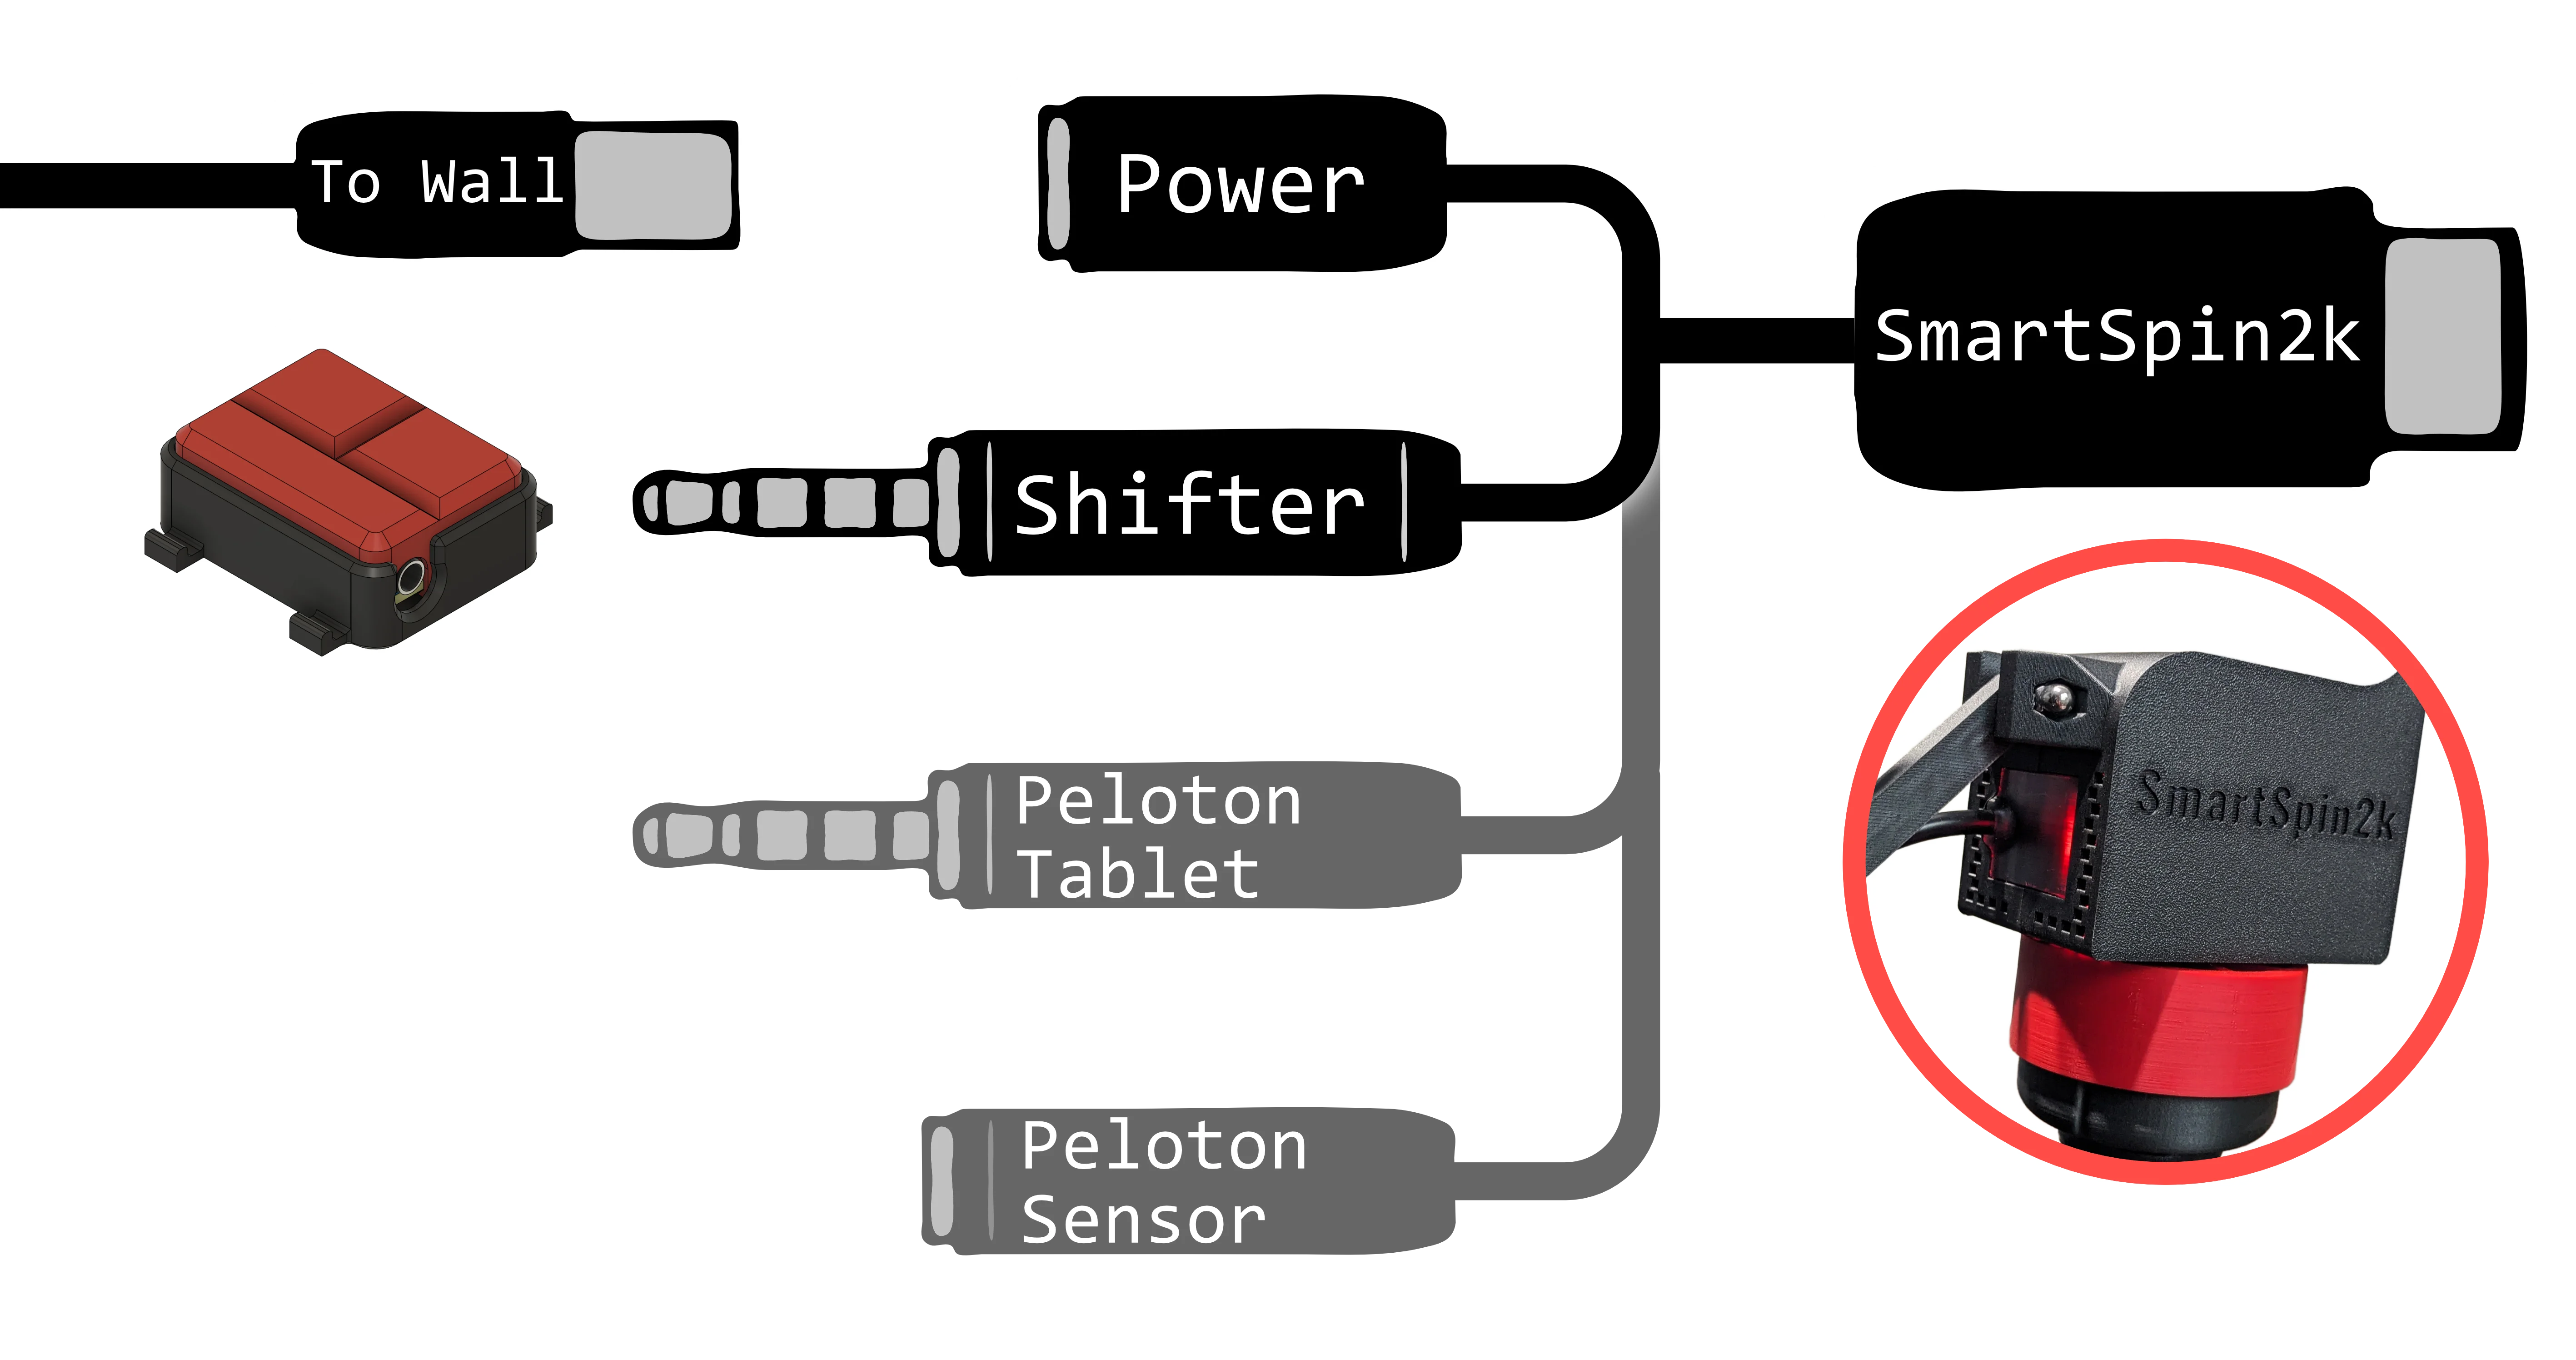
Plug the Power connector into the power adapter and the Shifter connector into the shifter. The next steps connect the bike’s sensor cable.
Sensor wiring
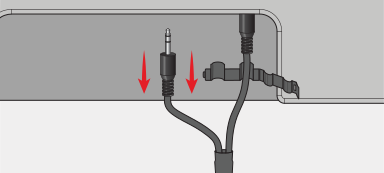
Unlatch the cable retention clip on the back of the Peloton tablet. Use a small flat screwdriver if needed. Unplug the sensor wire from the tablet.
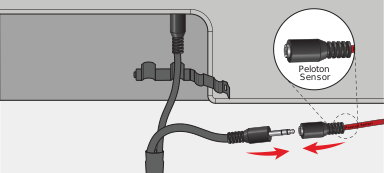
Plug the sensor wire into the Peloton Sensor connector on the SmartSpin2k breakout cable.
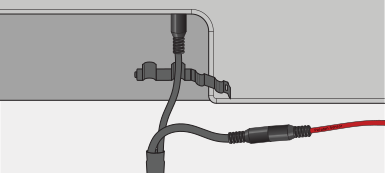
Leave the cable retention clip unlatched for now.
Side switch
The bike sends power data to one device at a time, either the Peloton tablet or the SmartSpin2k. The side switch on the SmartSpin2k body picks which one.
Tablet Mode (switch UP): Pick this if you still take Peloton classes or want the Grupetto overlay. The tablet requests the data and SmartSpin2k listens.
Headless Mode (switch DOWN): Pick this if you do not plan to take Peloton classes. SmartSpin2k talks to the bike directly. The tablet can still run other apps.
- 1Flip the Side Switch UP
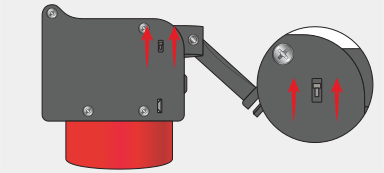
Slide the side switch on your SmartSpin2k to the UP position.
2Connect the Peloton Tablet Cable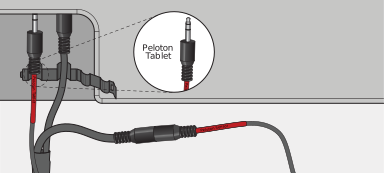
Plug the SmartSpin2k cable labeled Peloton Tablet into the tablet port the sensor wire used.
3Re-latch the Cable Retention Clip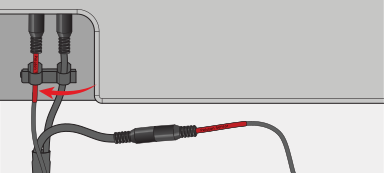
Snap the cable retention clip back into place over the wires.
- 1Flip the Side Switch DOWN
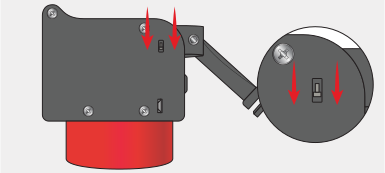
Slide the side switch on your SmartSpin2k to the DOWN position.
2Leave the Peloton Tablet Cable Disconnected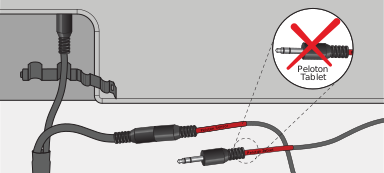
Do not plug the Peloton Tablet cable into your bike. Coil it out of the way.
3Re-latch the Cable Retention Clip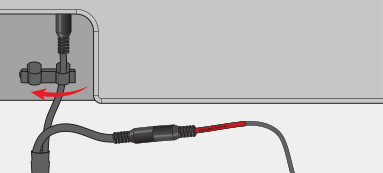
Snap the cable retention clip back into place over the remaining tablet cable.
Going back to Peloton classes later? Move the side switch UP and plug the Peloton Tablet cable back in first.
Part 3 · Connect the app
- Install the SmartSpin2k Companion App from the App Store or Google Play.
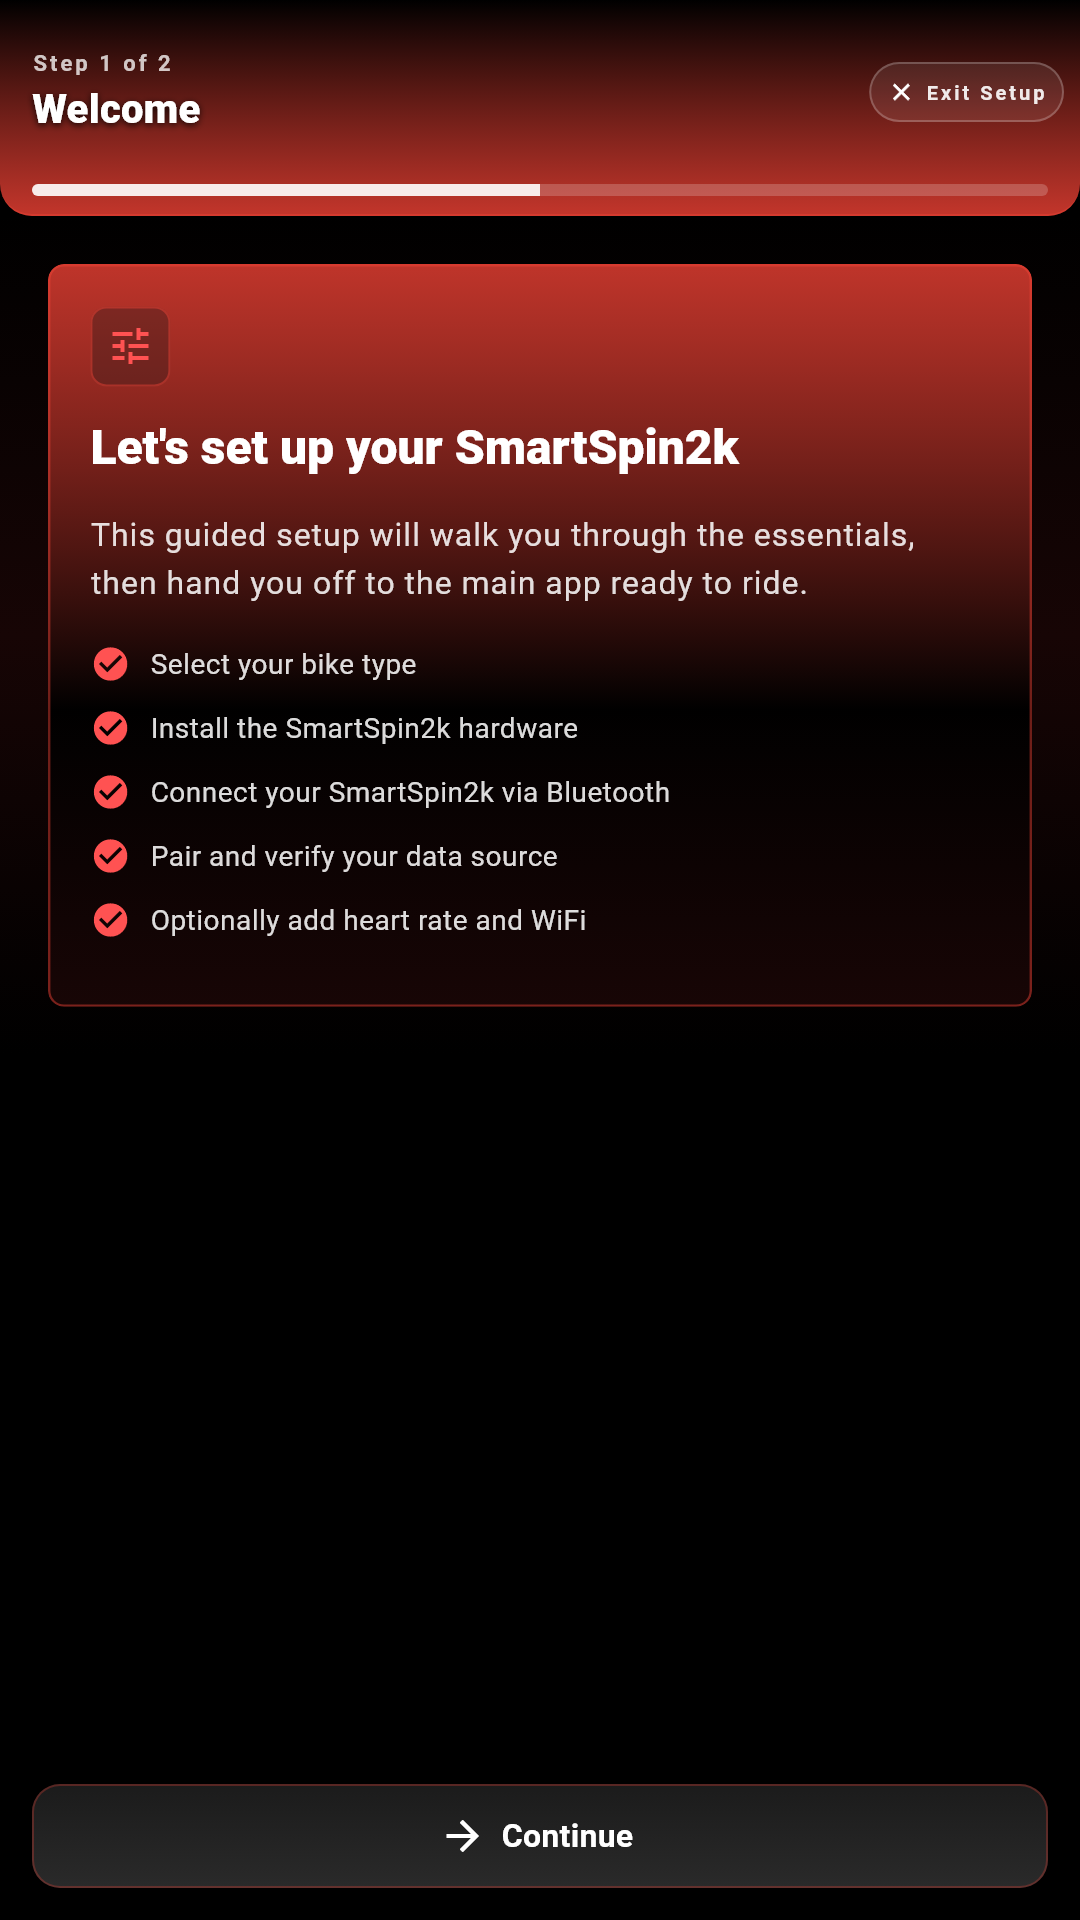
- Open the Companion App. On first launch, Guided Setup opens. Follow it to the end, or tap Exit Setup at the top right to continue with this page.
- On the Find Your SmartSpin2k screen, tap SCAN.
- Tap CONNECT next to your SmartSpin2k.
- The Device screen opens. The header shows the device name and firmware version.
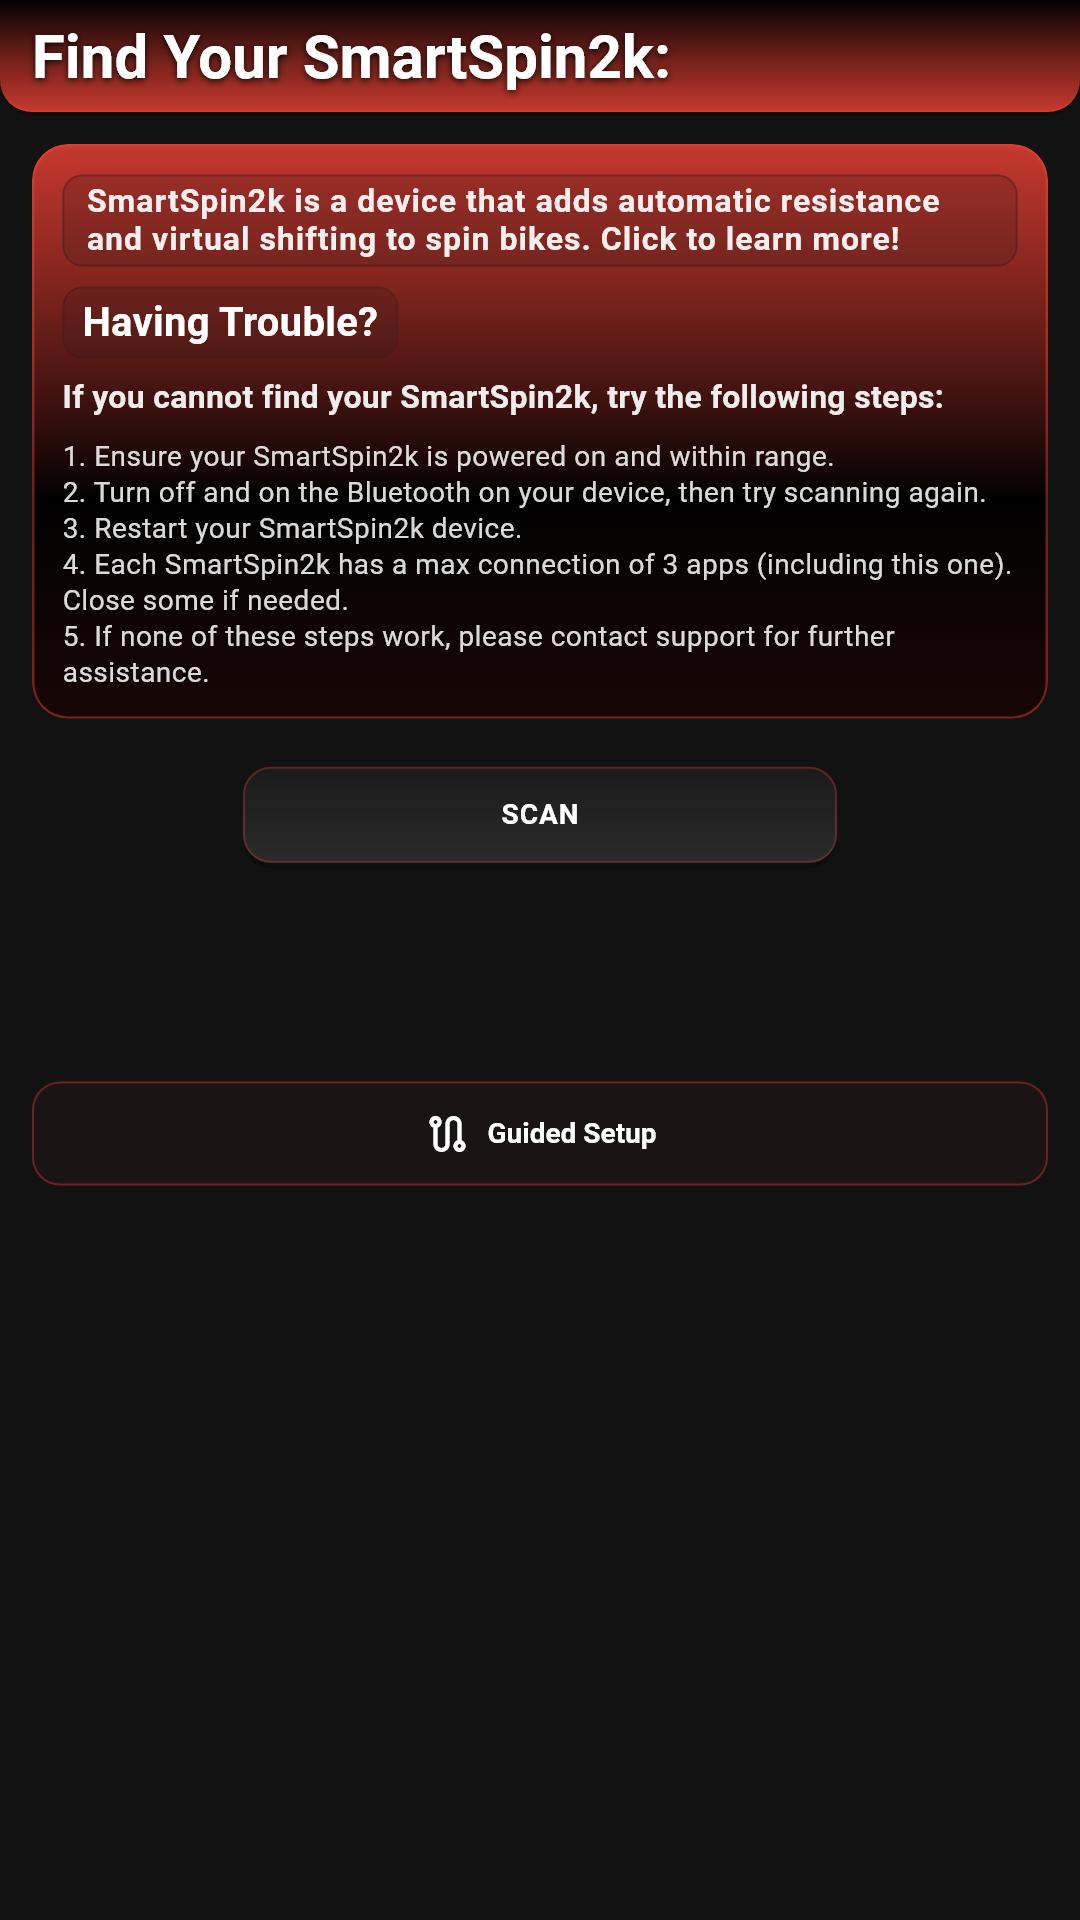
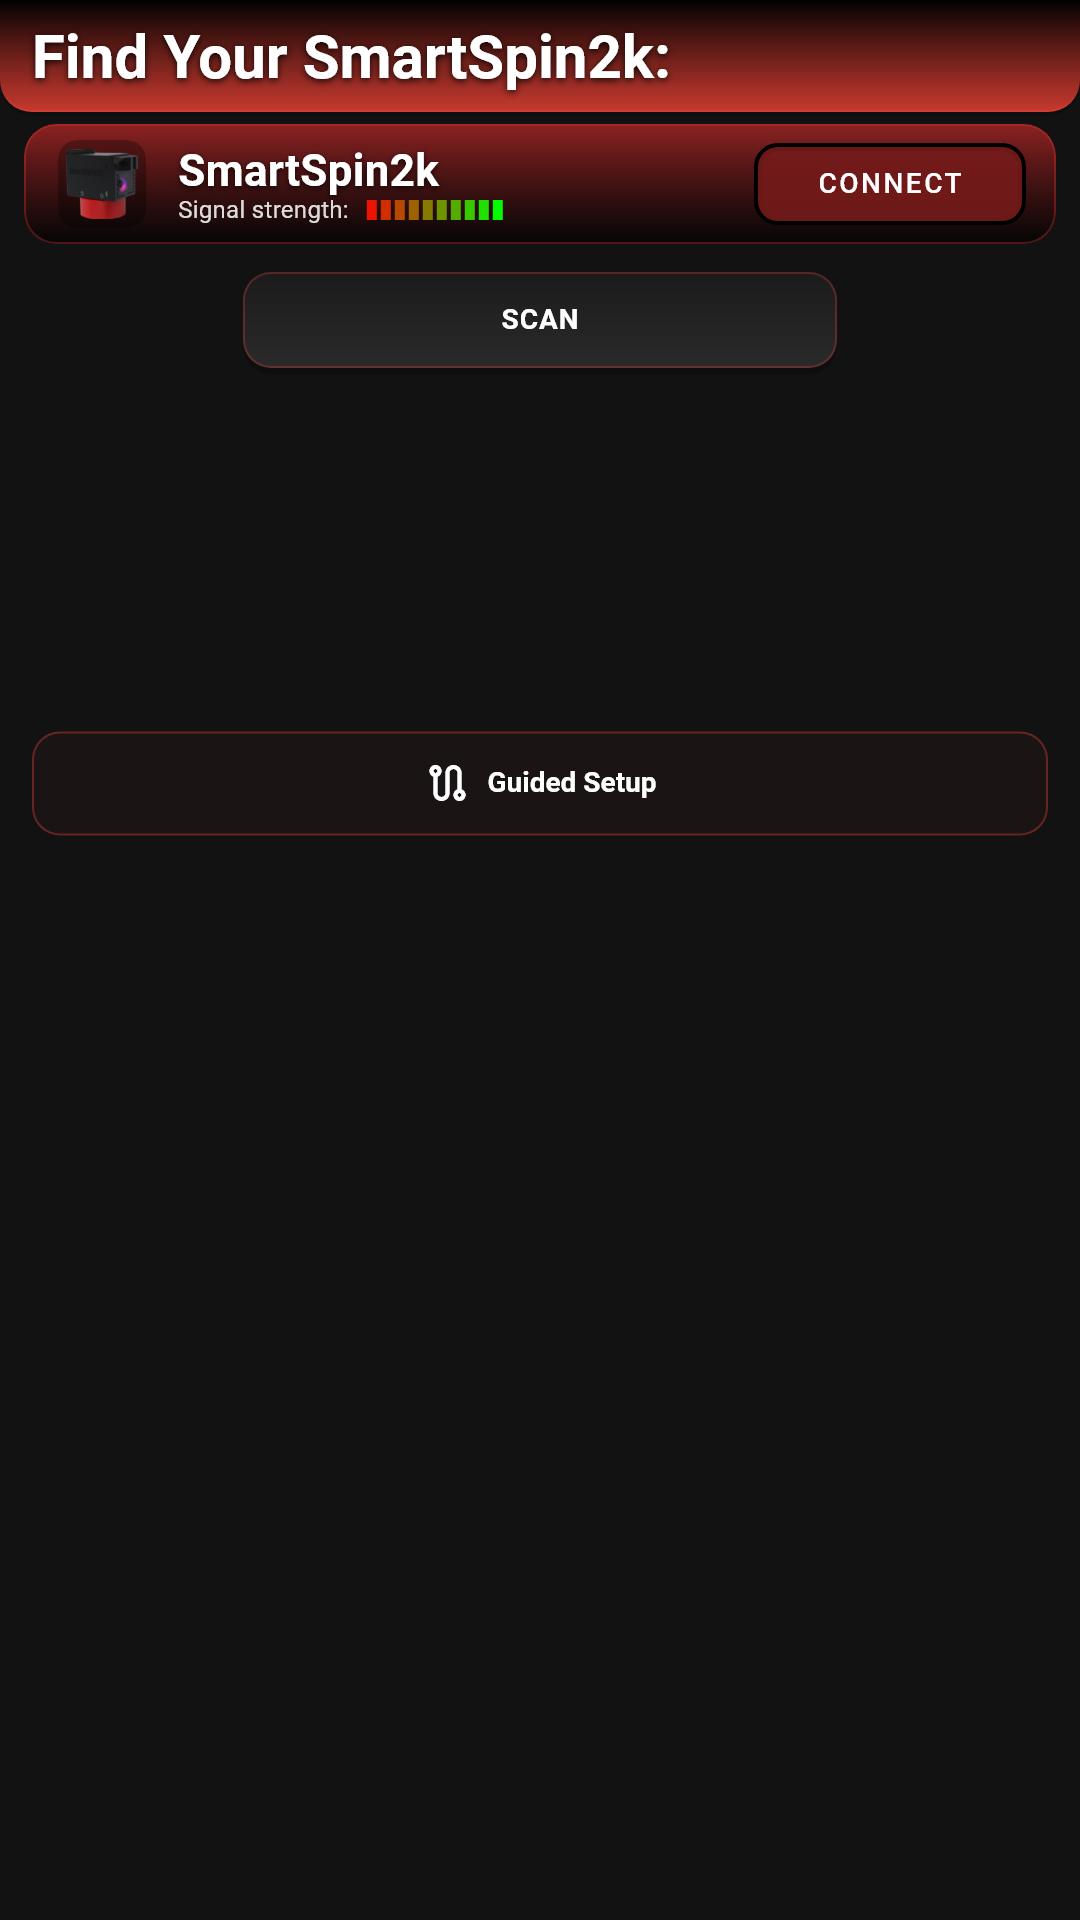
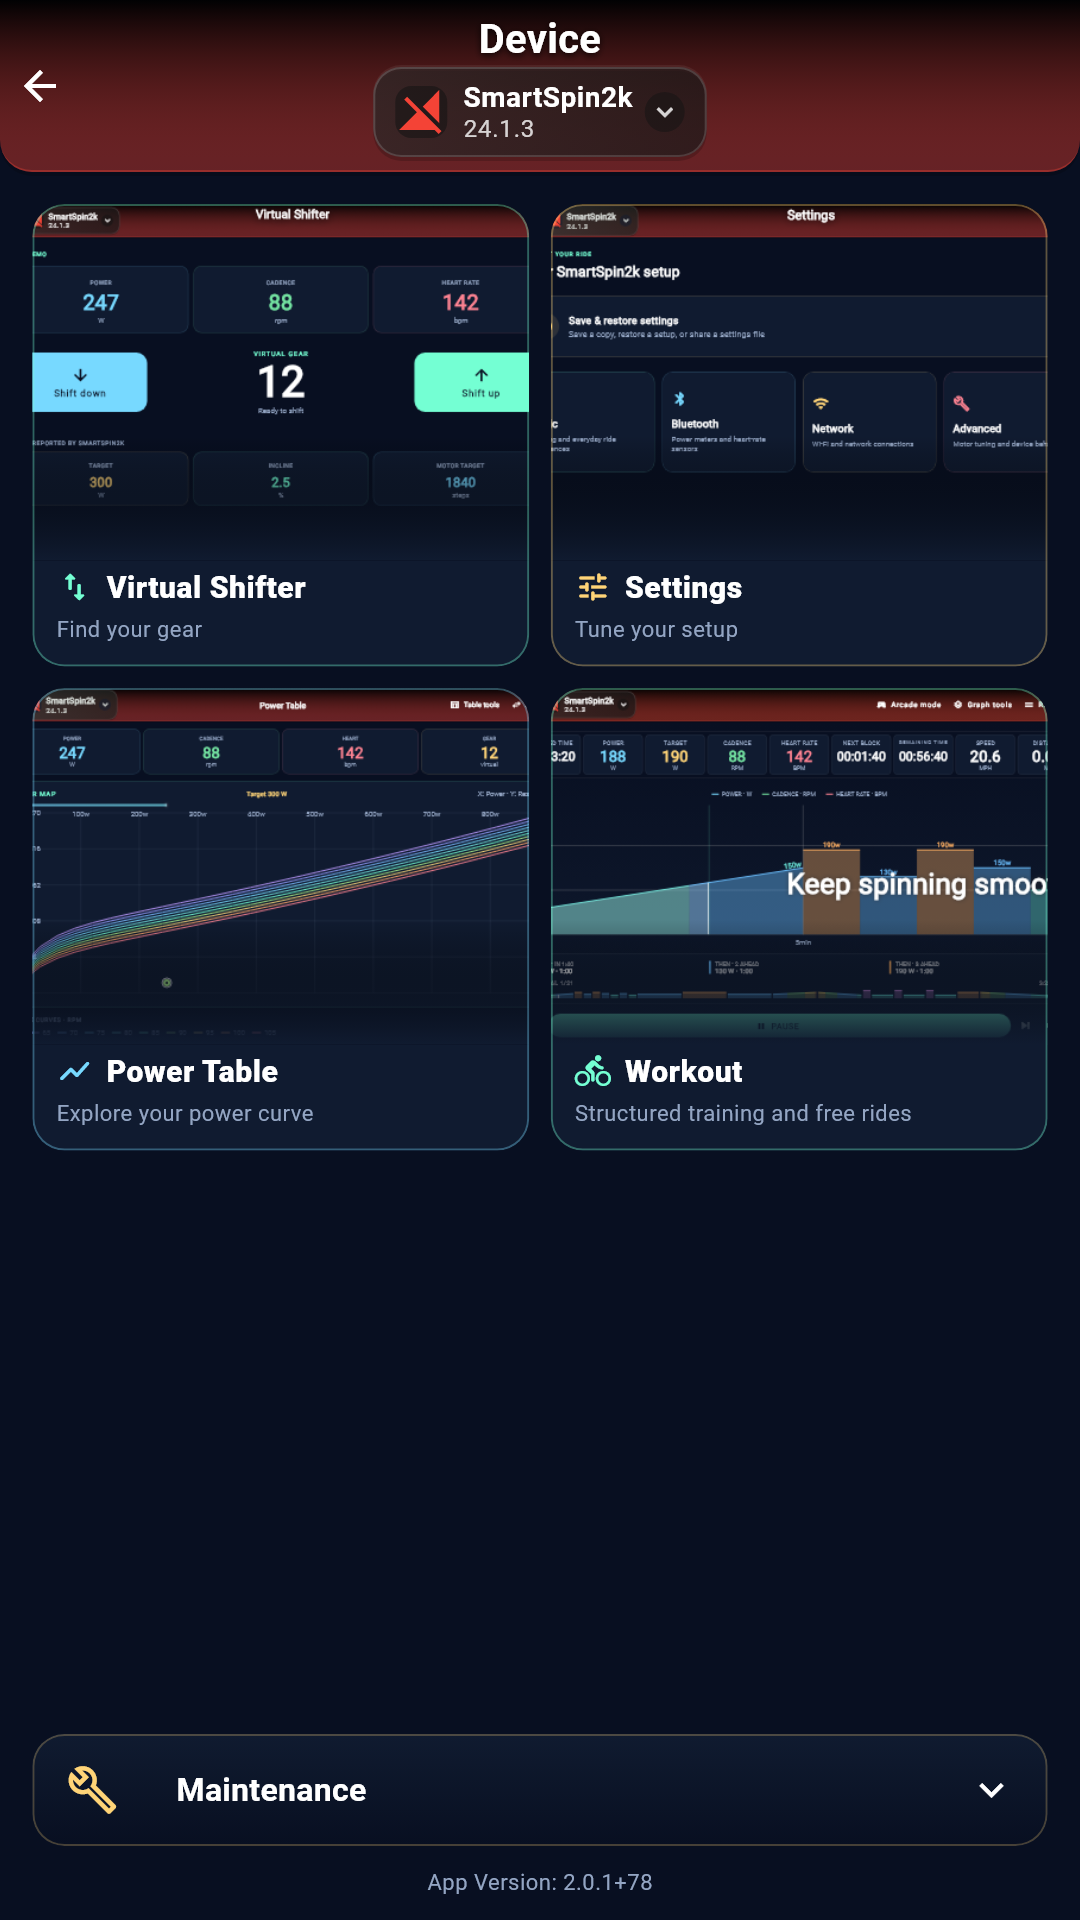
If your SmartSpin2k is not listed, see Can’t find your SmartSpin2k.
Part 4 · Choose your power source
SmartSpin2k starts with Saved Power Meter set to none. Pick your bikepower meter once. SmartSpin2k reconnects to it on every ride.
- Wake your bikepower meter. Pedal a few turns. Close any other app connected to it.
- In the Companion App, on the Device screen, tap Settings, then Bluetooth.
- Tap Saved Power Meter.
- Tap SCAN. Scanning takes up to 20 seconds.
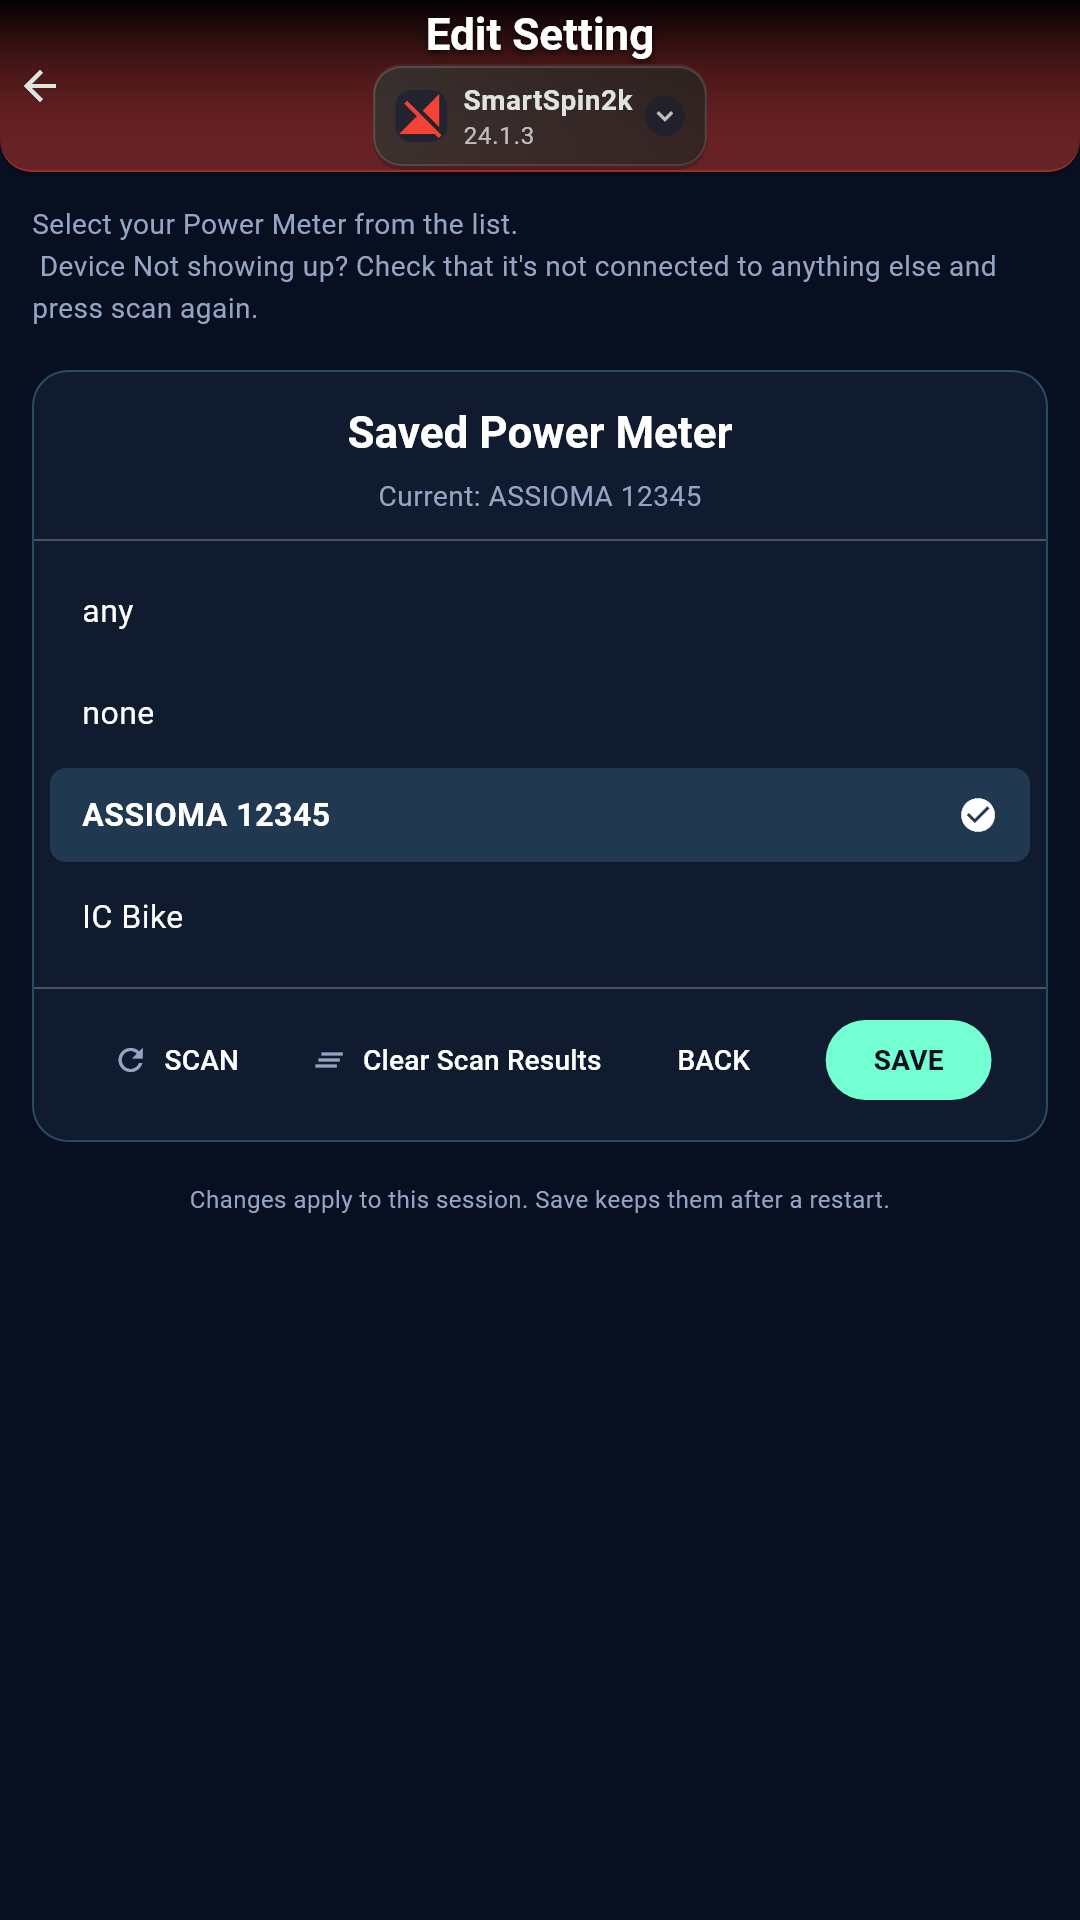
- Tap your bikepower meter in the list. A Schwinn IC4 or Bowflex C6 appears as IC Bike.Pedals appear under their brand name.
- Tap SAVE.
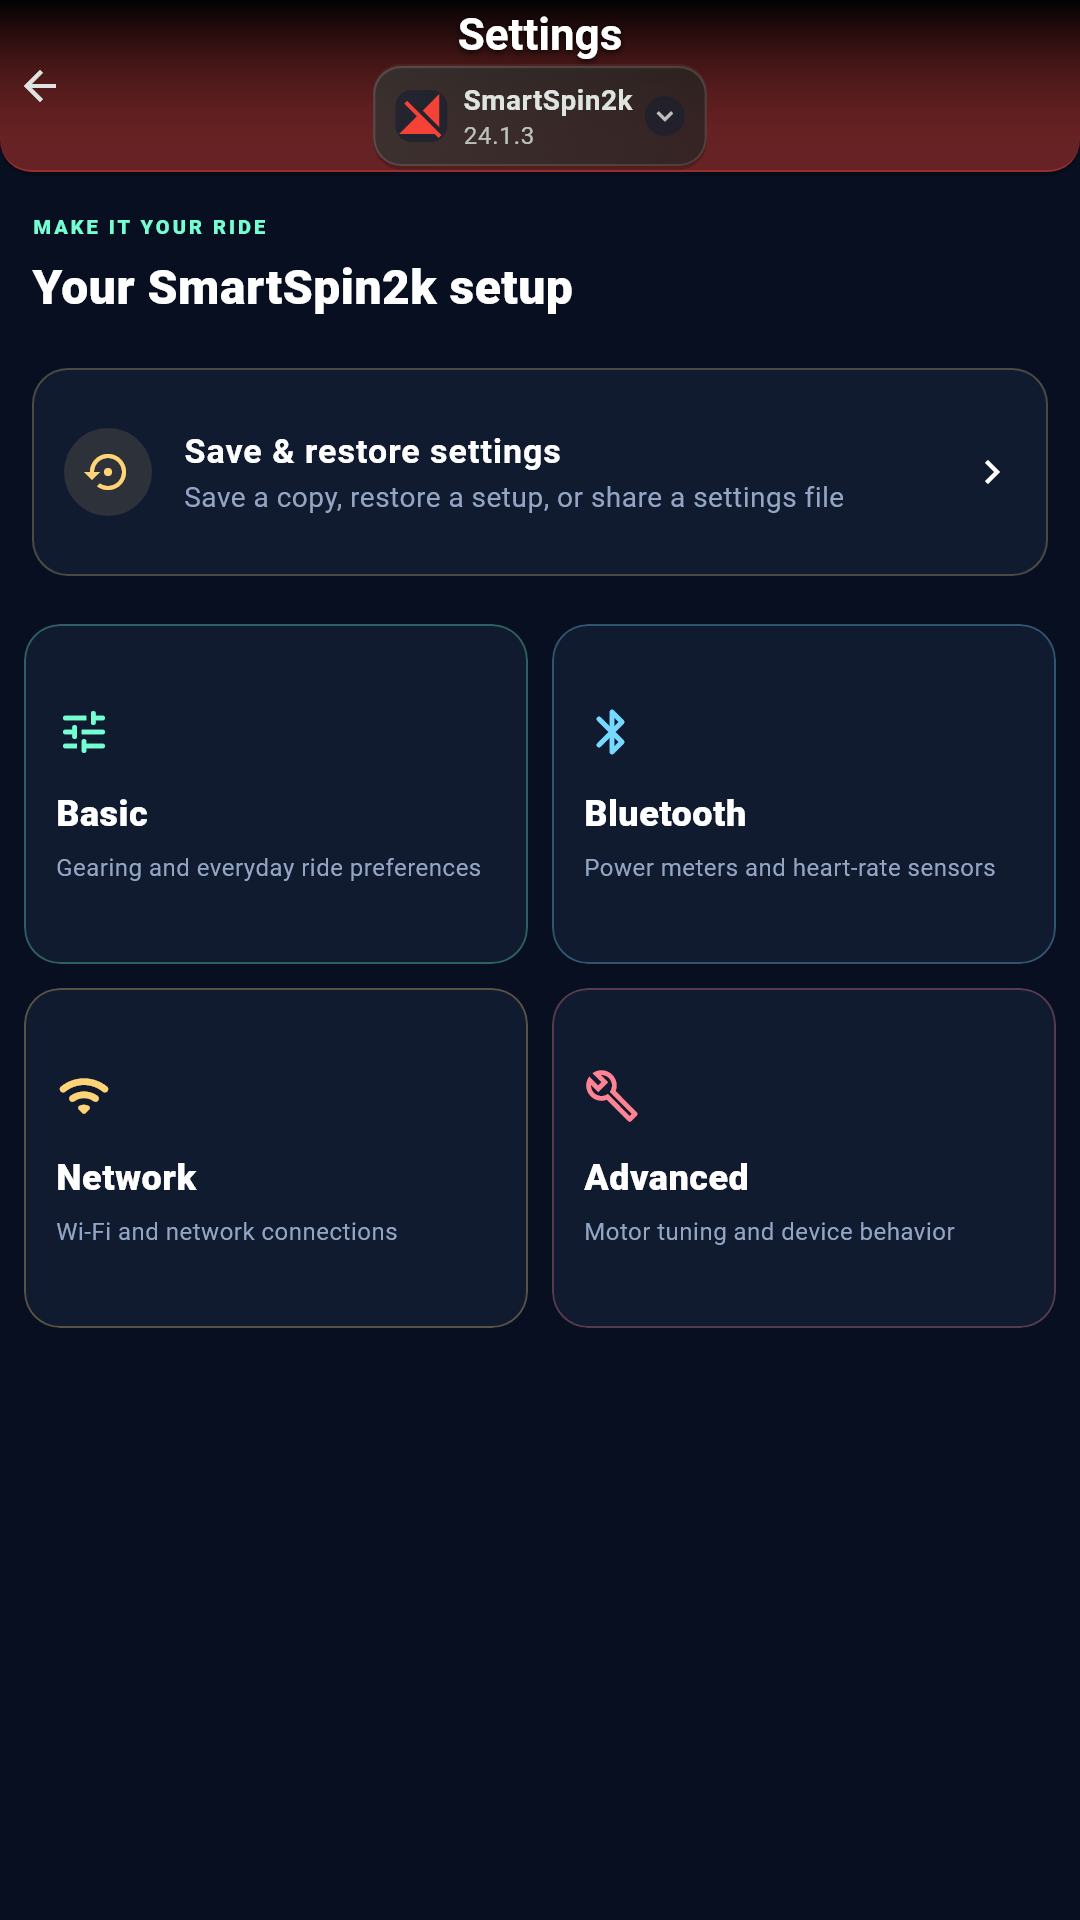
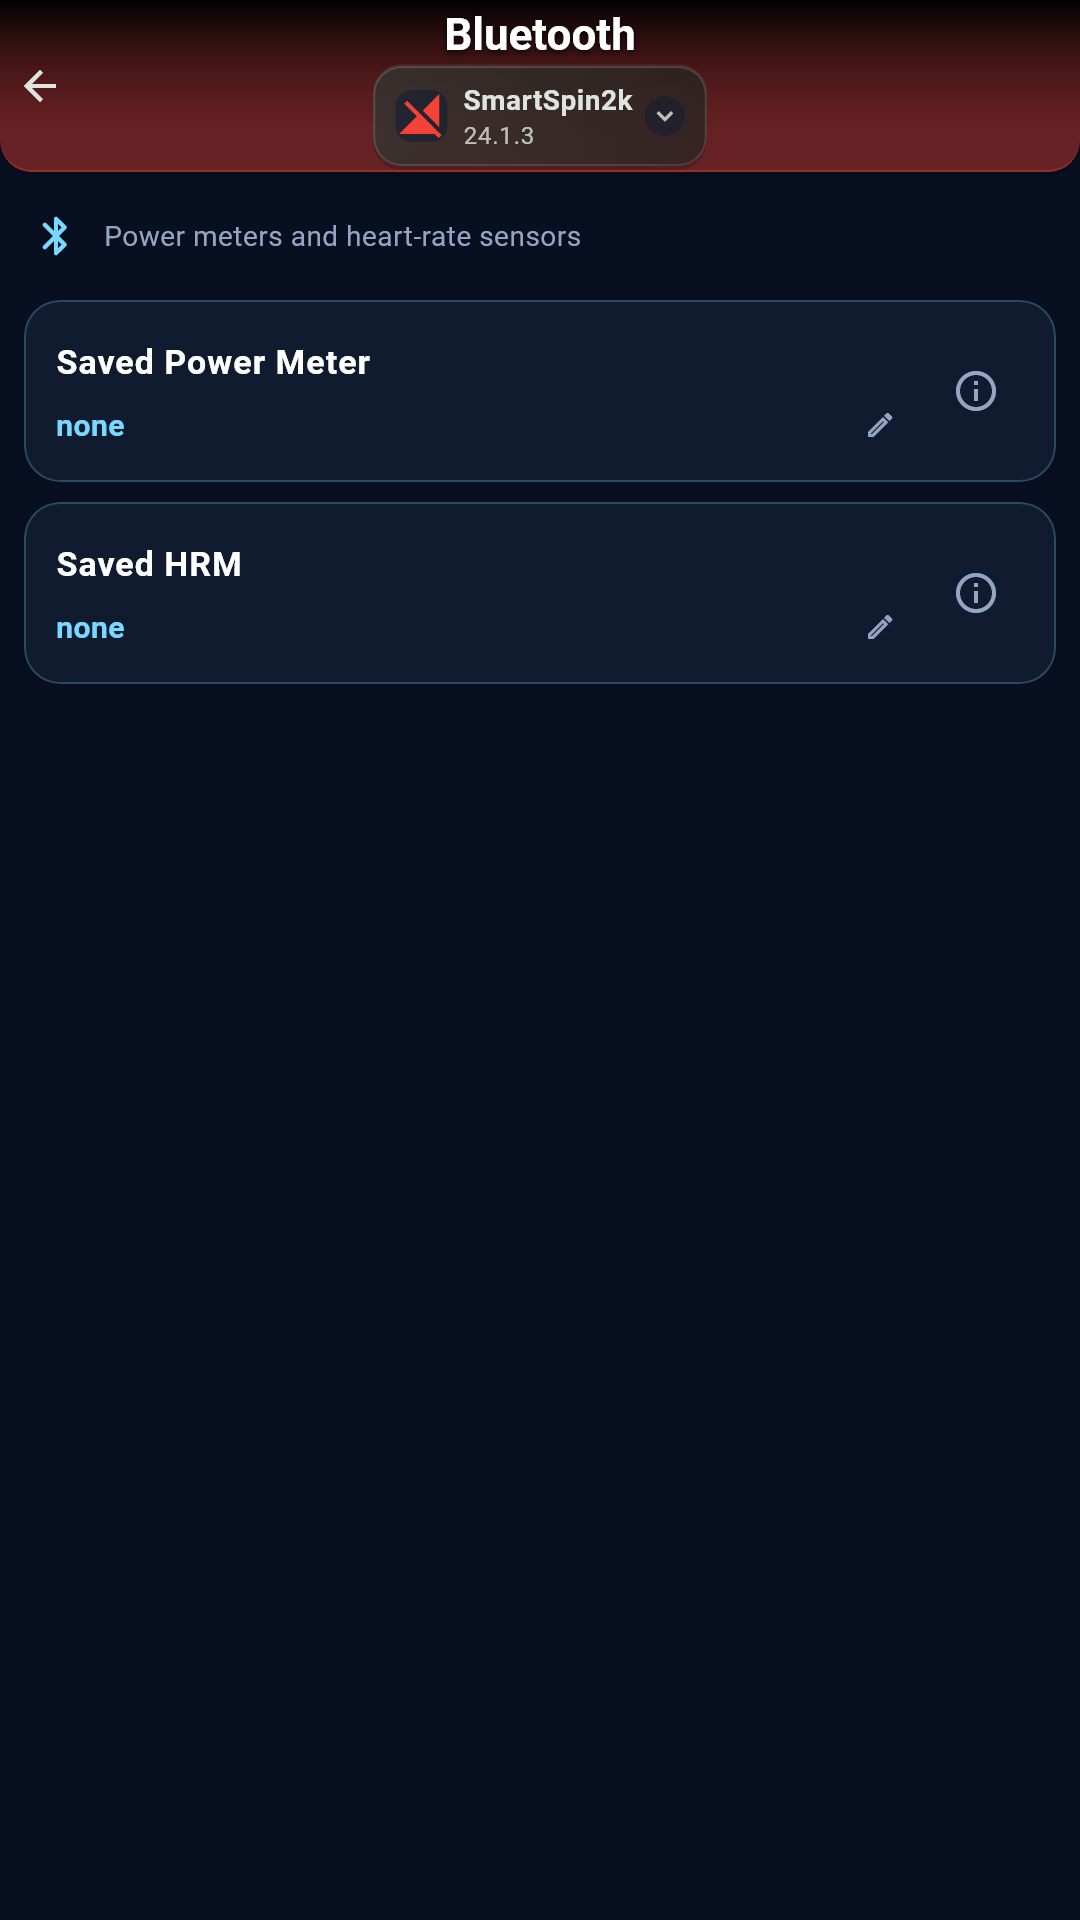
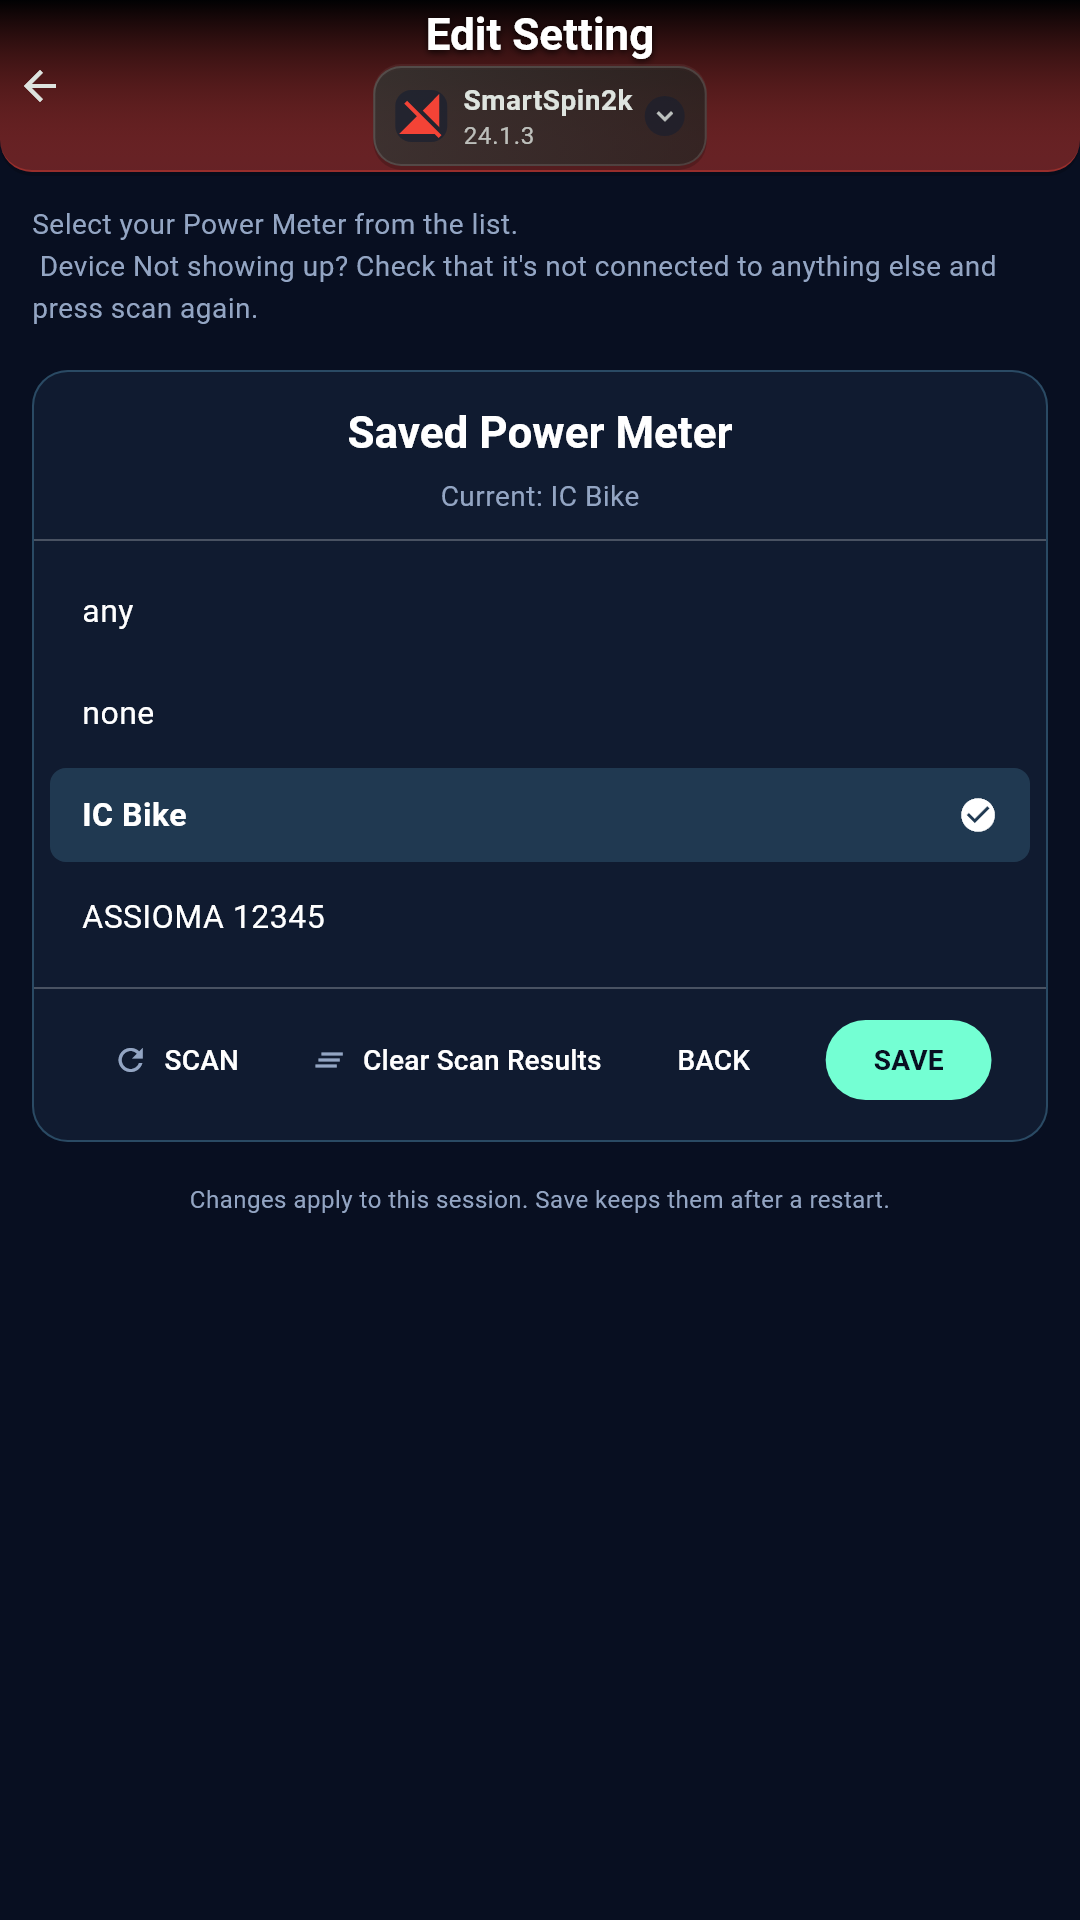
There is nothing to pick on this bike. The sensor cable from Part 2 feeds power and cadence to the SmartSpin2k. Leave Saved Power Meter set to none. It is on the Device screen under Settings, then Bluetooth.
In Tablet Mode the bike sends data only during a ride. Start a ride on the Peloton tablet (Just Ride works) or open the Grupetto overlay before you check the numbers. In Headless Mode, pedal.
Grupetto, installed on the Peloton tablet with OpenPelo, is optional on this bike and shows live cadence and power during non-Peloton rides.
The Bike+ does not send power and cadence on its own, so pick one source.
-
Grupetto is a free app for the Bike+ tablet that sends power and cadence over Bluetooth.
Installing Grupetto changes the software on the Bike+ tablet. Watch the full video before you start. It begins at the Grupetto step.
- Install Grupetto on the Bike+ tablet with OpenPelo, following the video.
- Open Grupetto and turn on BLE TX in its settings.
- Pedal a few turns. Grupetto shows live cadence and power.
- In the Companion App, on the Device screen, tap Settings, then Bluetooth.
- Tap Saved Power Meter.
- Tap SCAN. Scanning takes up to 20 seconds.
- Tap Grupetto FTMS in the list.
- Tap SAVE.
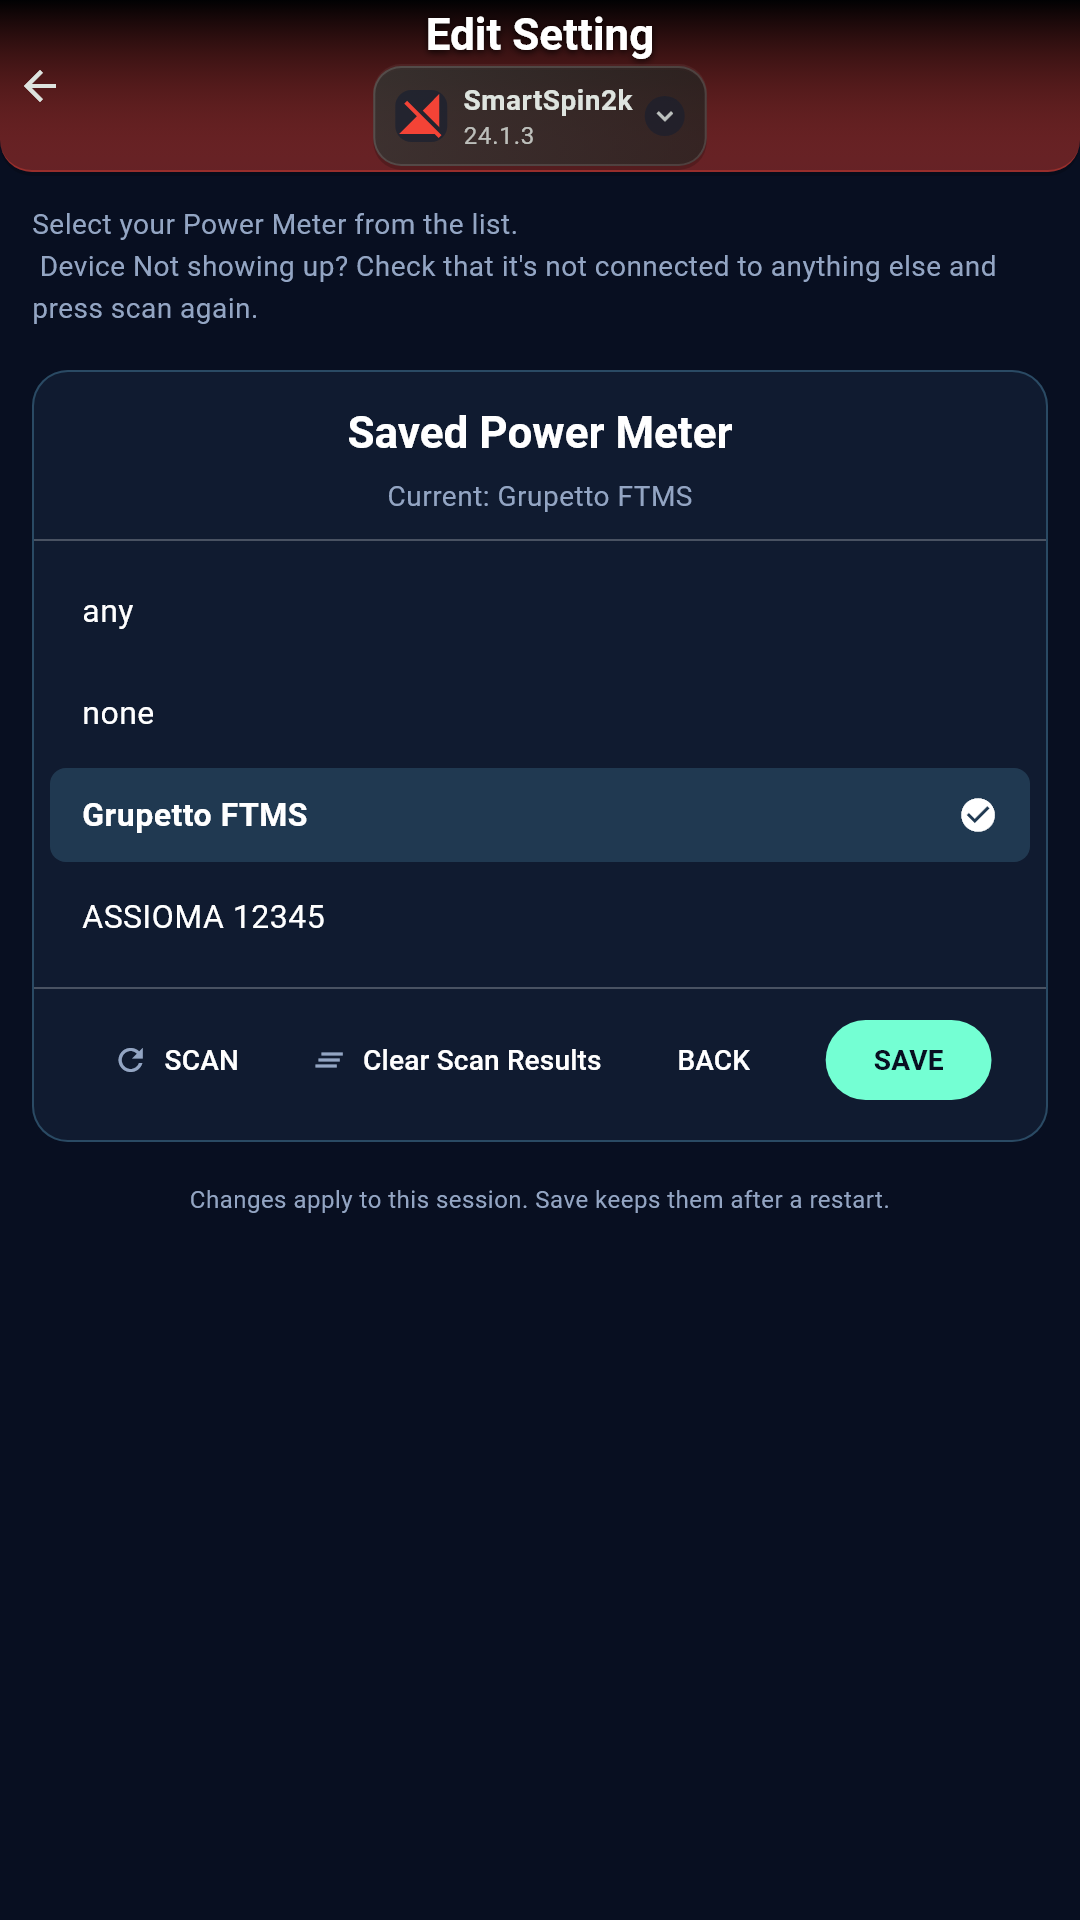
Grupetto FTMS selected Leave Grupetto open while you ride.
-
Power meter pedals, such as Favero Assioma or Garmin Rally, appear in the Companion App under their brand name.
- Fit the pedals following the maker’s instructions.
- Pedal a few turns to wake them.
- In the Companion App, on the Device screen, tap Settings, then Bluetooth.
- Tap Saved Power Meter.
- Tap SCAN. Scanning takes up to 20 seconds.
- Tap your pedals in the list.
- Tap SAVE.
Power meter pedals selected
Part 5 · Check the numbers
- On the Device screen, tap Virtual Shifter.
- Pedal for a few seconds. Your bikepower meter wakes and starts sending data.Tablet Mode: start a ride on the Peloton tablet (Just Ride), or open the Grupetto overlay. Headless Mode: pedal for a few seconds.Grupetto: pedal with Grupetto open and BLE TX on. Pedals: pedal a few seconds to wake them.
- The status line changes from WAITING FOR TELEMETRY to LIVE TELEMETRY. POWER and CADENCE show your numbers.
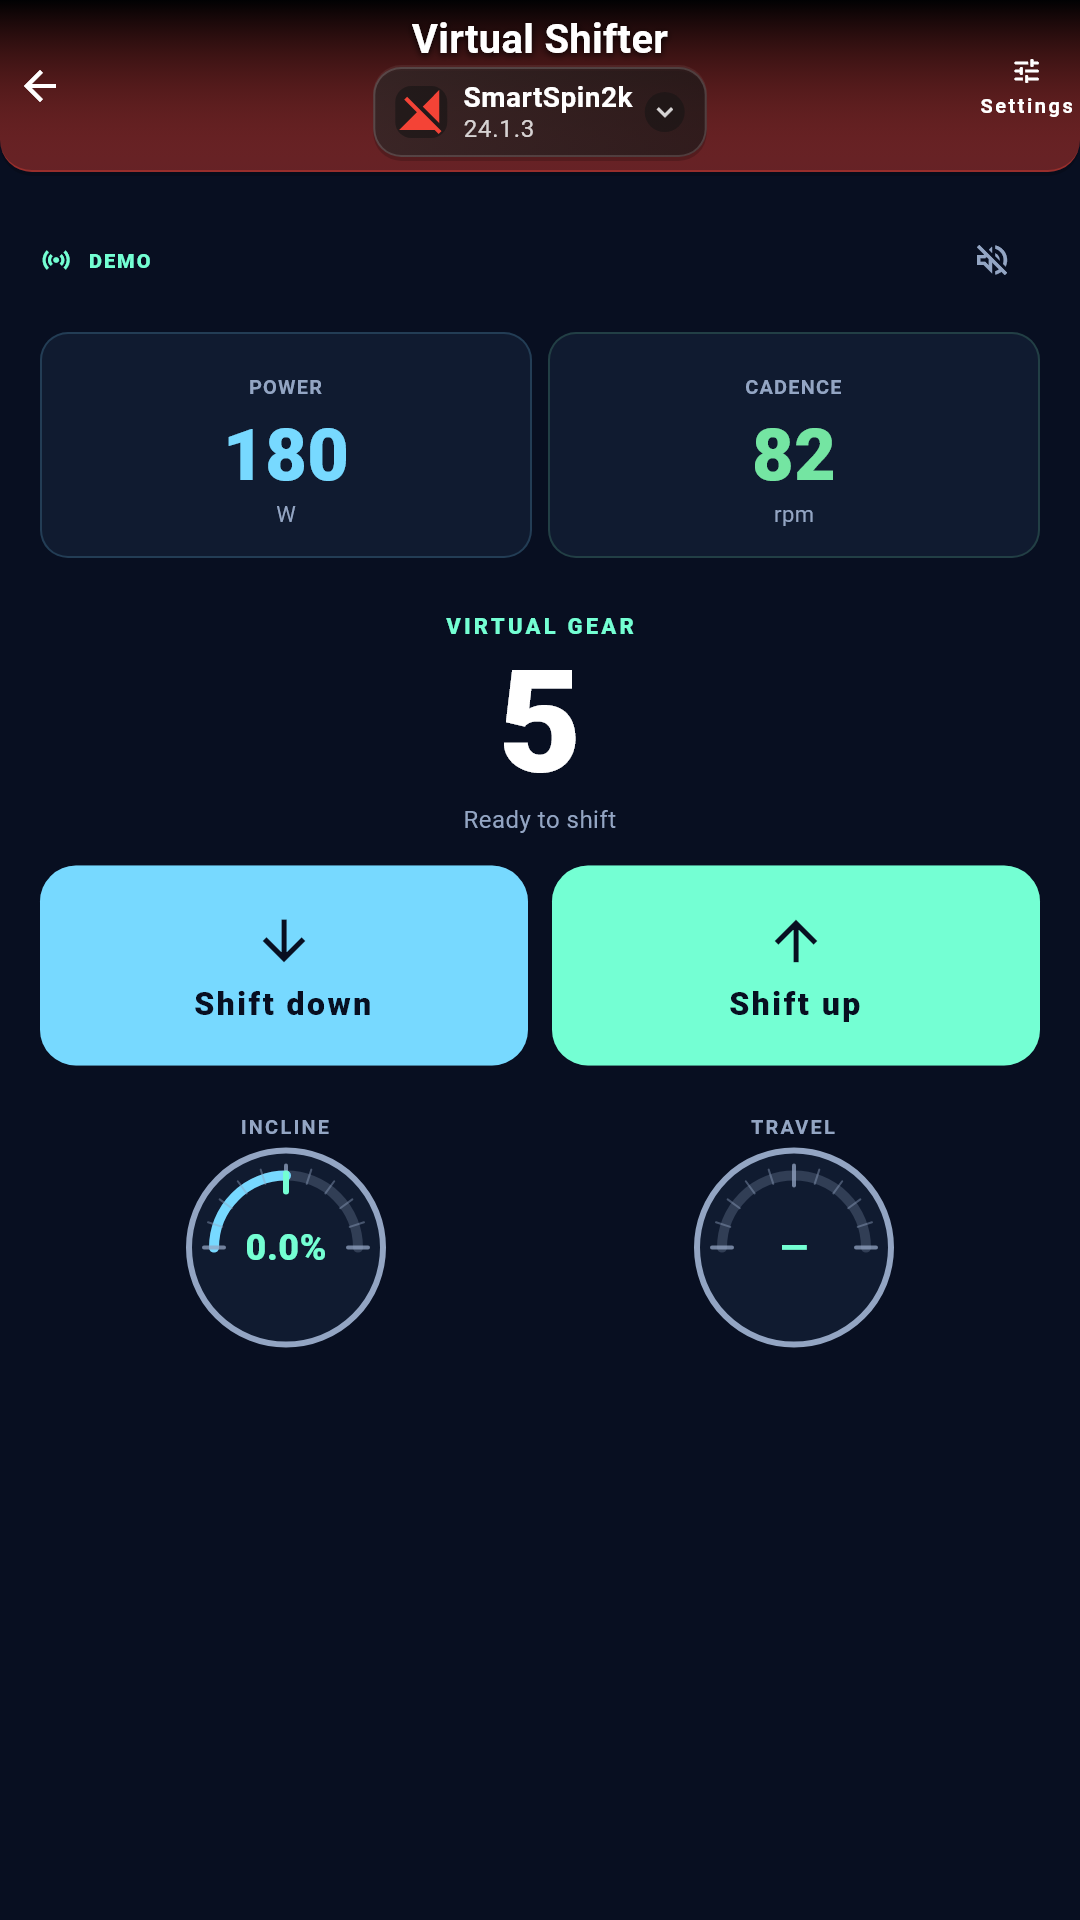
If your numbers still show zero after 20 seconds, see No power or cadence numbers.
Part 6 · Test the shifter
- On Virtual Shifter, tap Shift up. The resistance knob turns and VIRTUAL GEAR goes up by one.
- Tap Shift down. The knob turns back.
- Press the up button, then the down button, on the shifter on your handlebar. The gear number follows.
Shifter reversed?
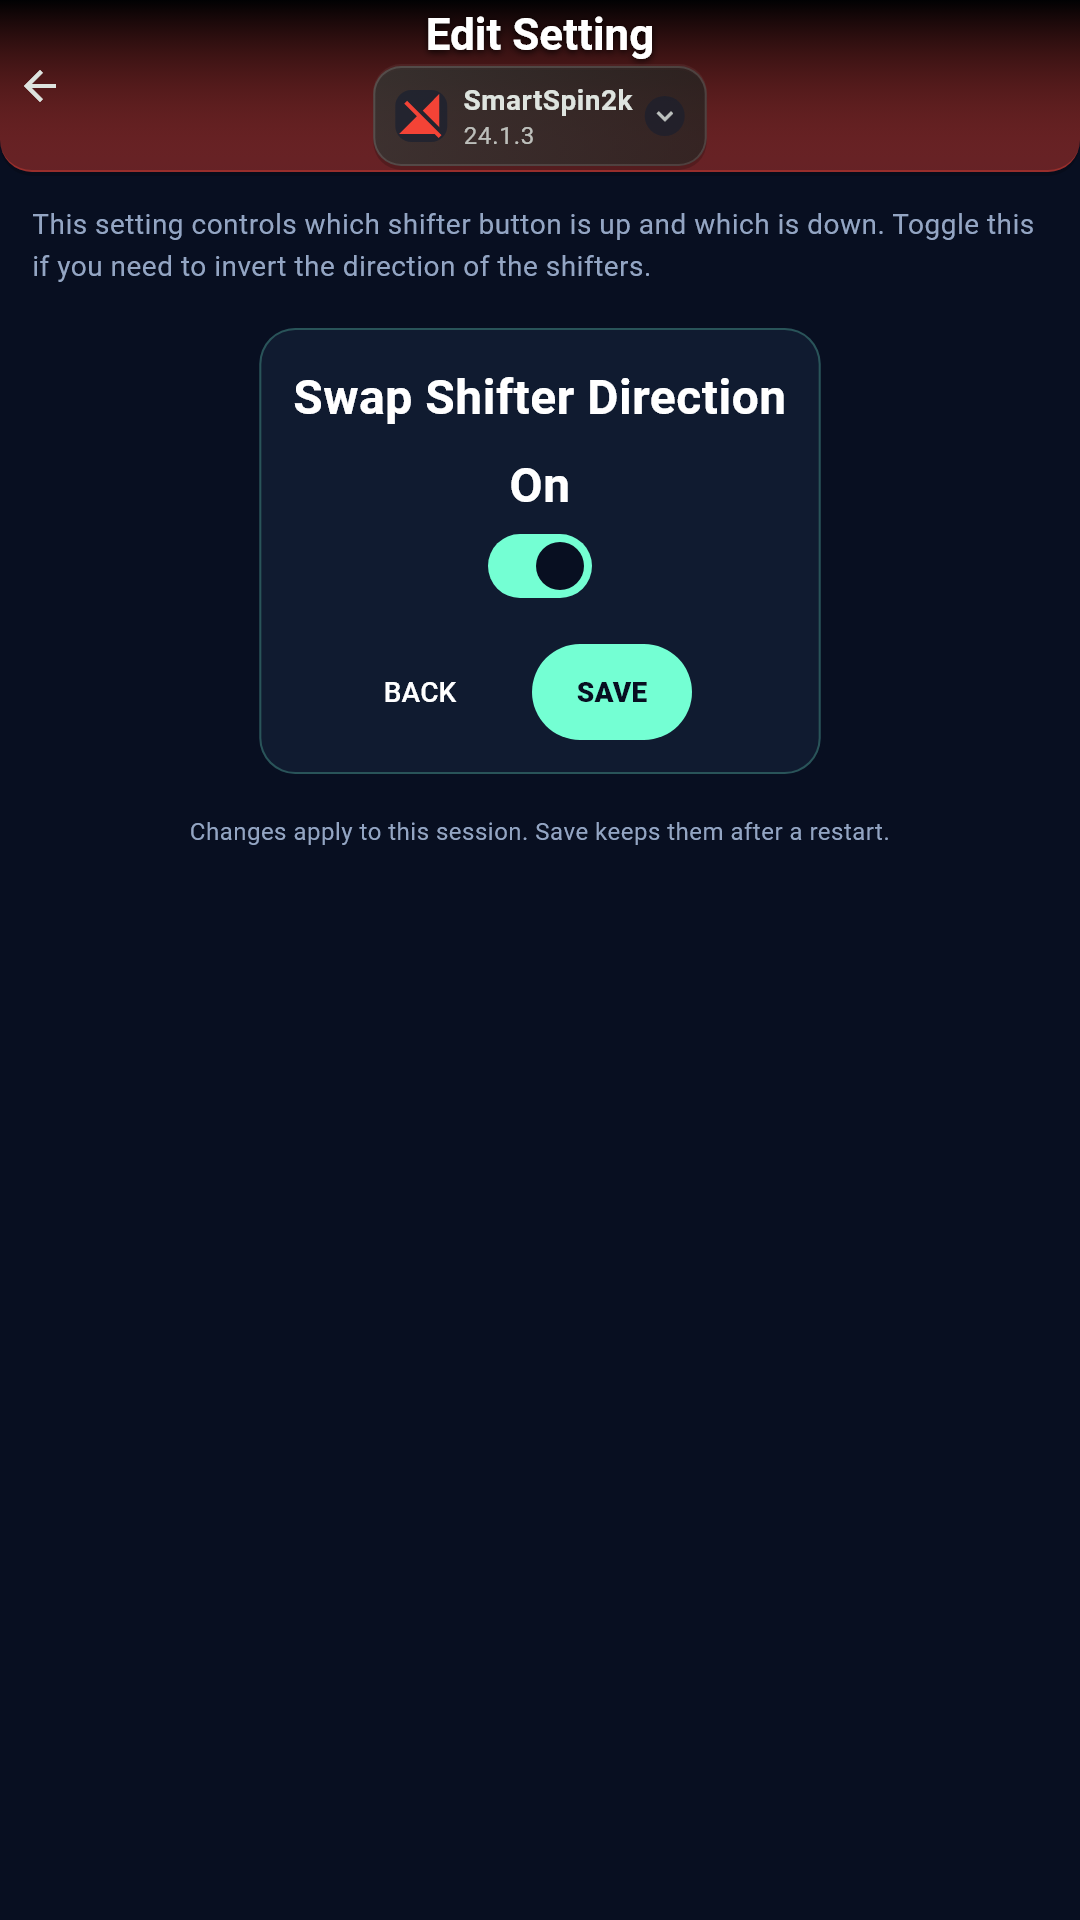
If the up button on your shifter lowers the gear, swap the direction.
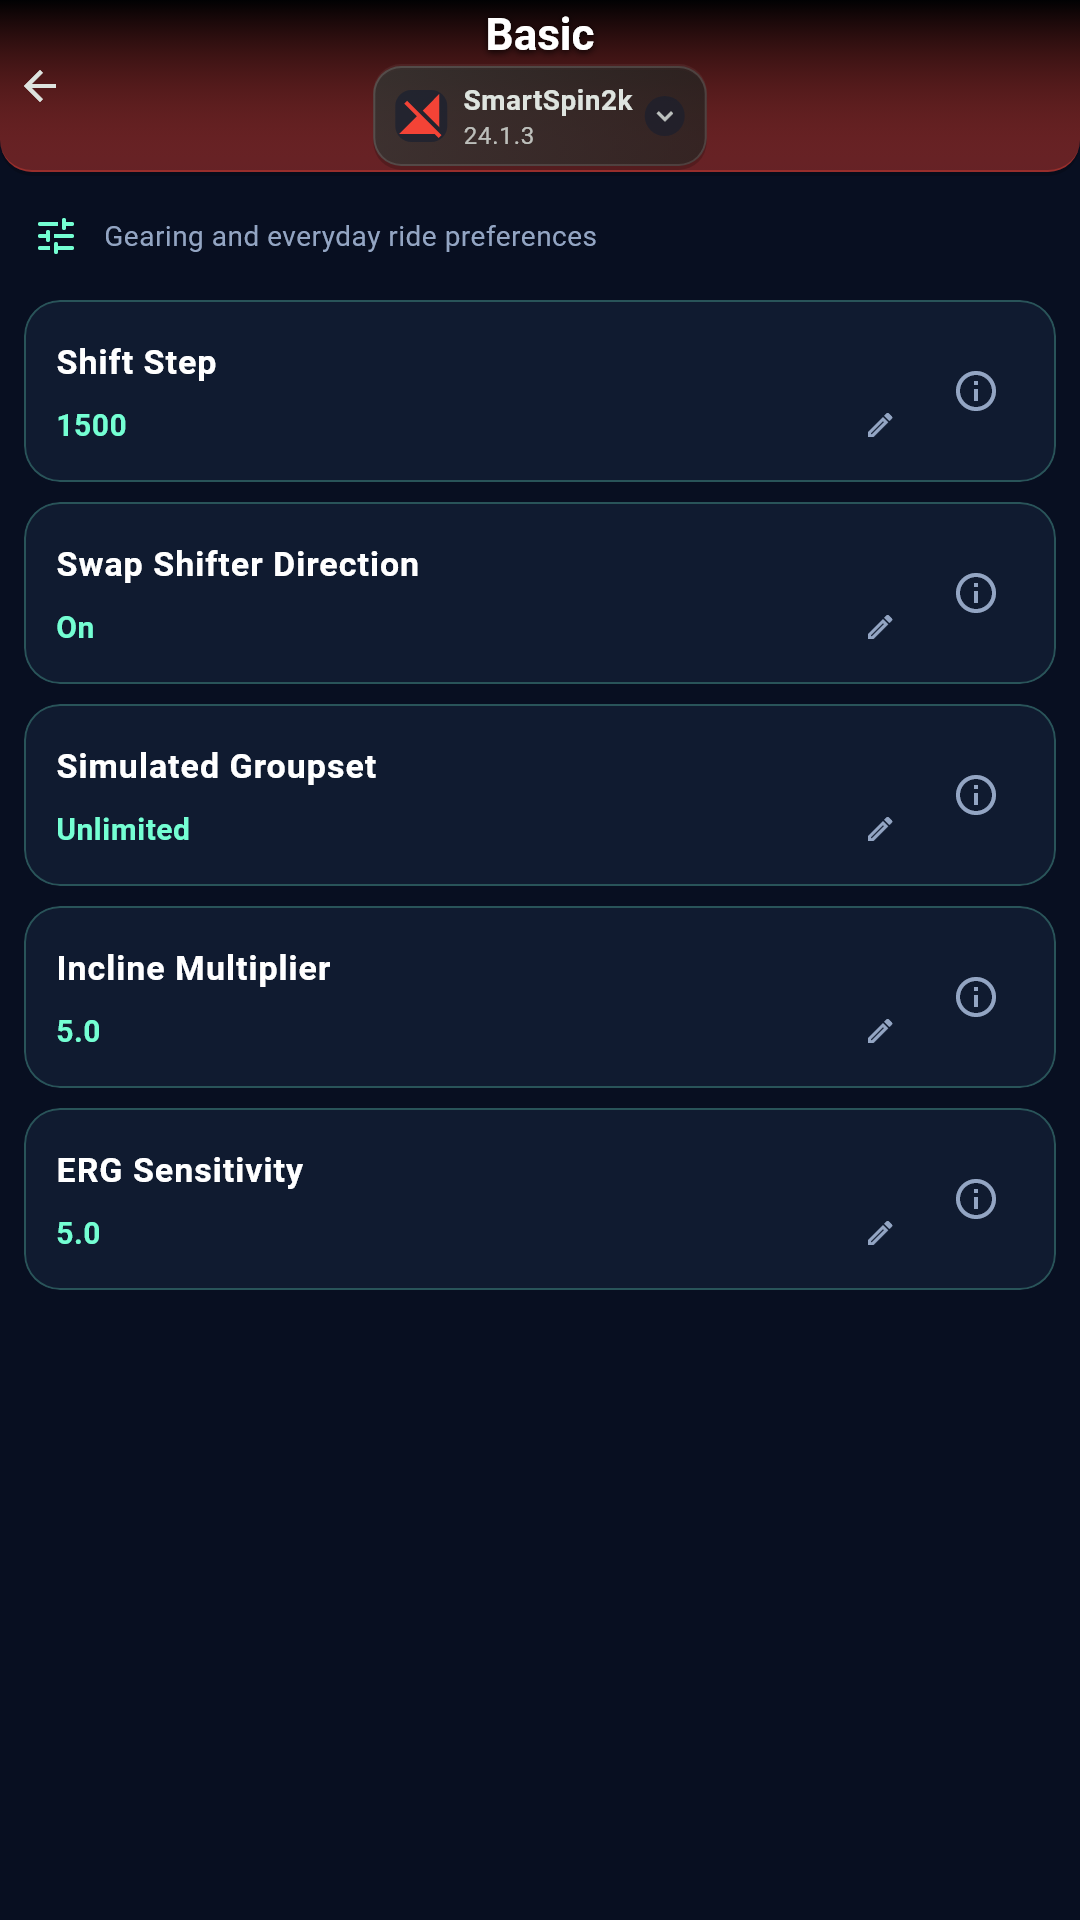
- On Device, tap Settings, then Basic, then Swap Shifter Direction.
- Flip the switch, then tap SAVE.
If the knob does not move when you shift, see Knob does not move.
Part 7 · Optional: heart rate and WiFi
Heart rate monitor
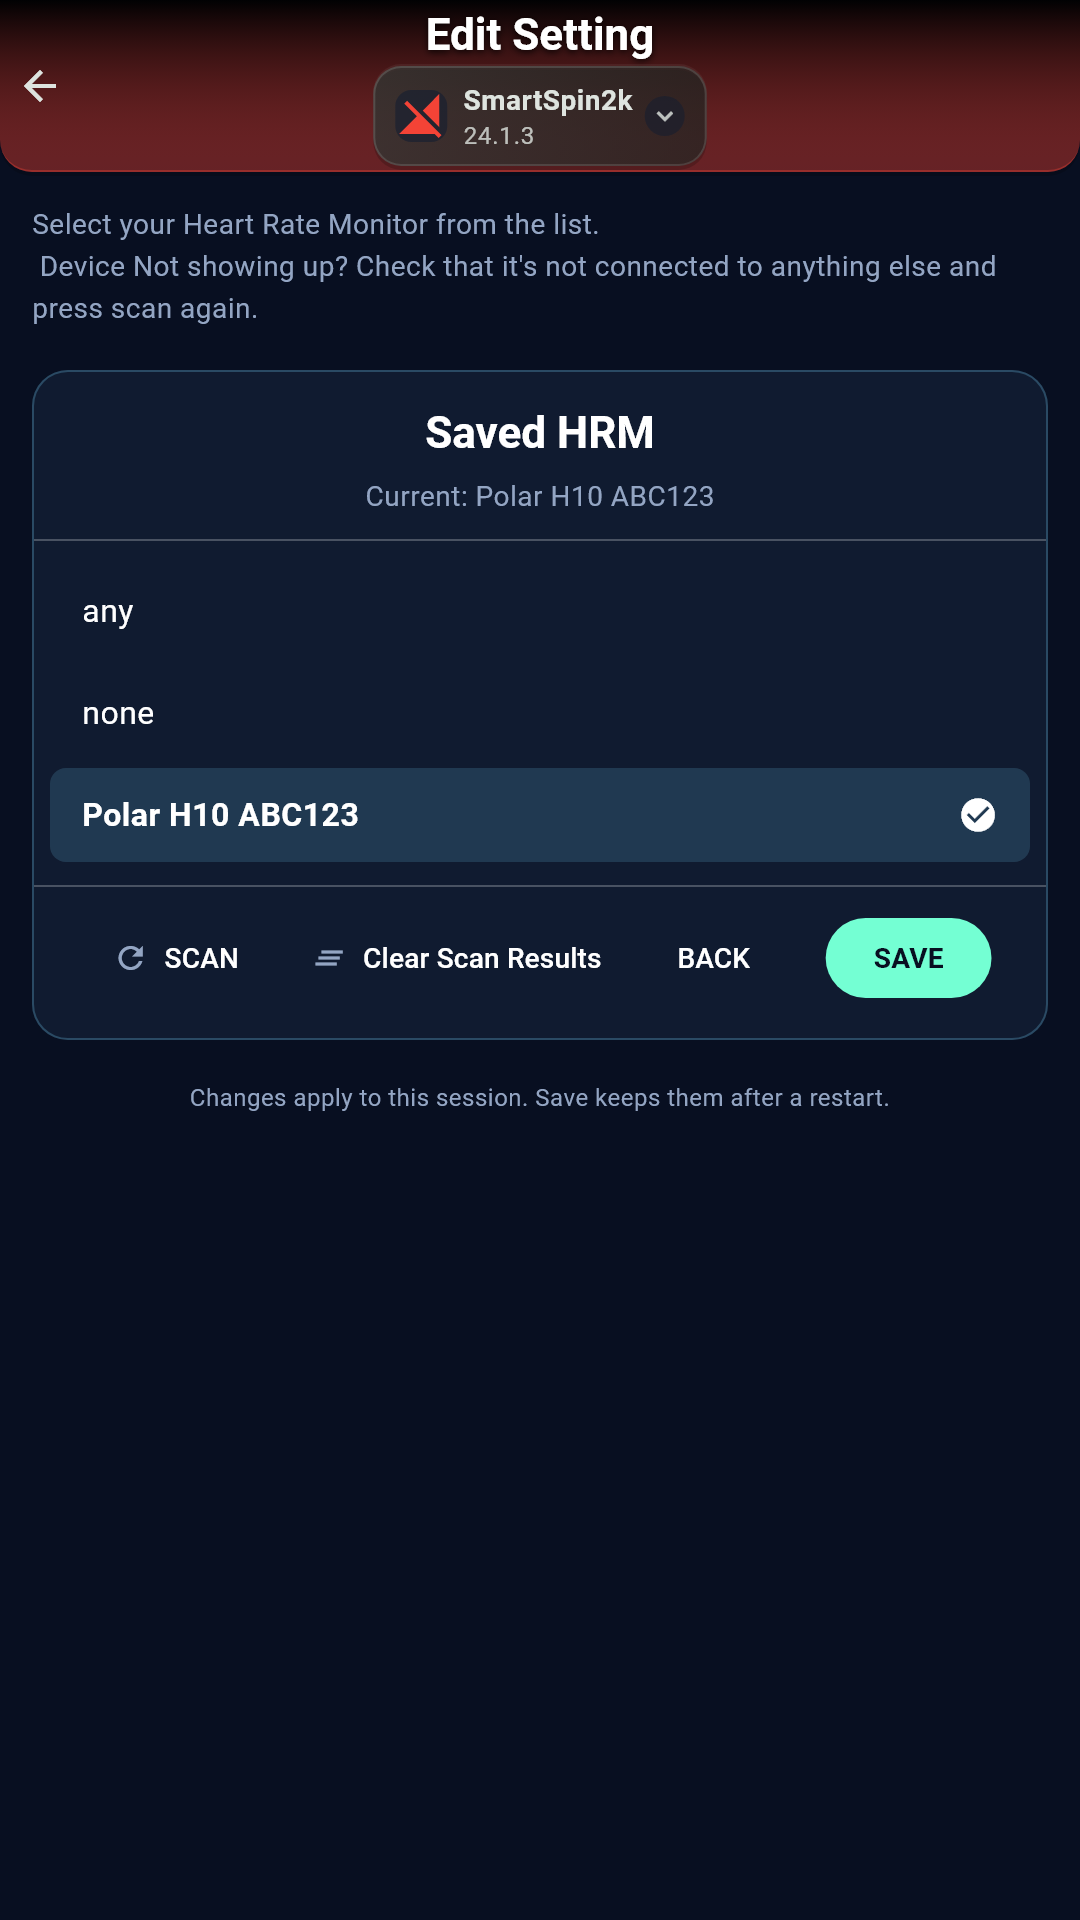
SmartSpin2k can relay your heart rate to your training app. This helps on Apple TV, which allows only a few Bluetooth connections.
- Put on your heart rate monitor so it starts broadcasting.
- On Device, tap Settings, Bluetooth, then Saved HRM.
- Tap SCAN, tap your monitor in the list, then tap SAVE.
WiFi
WiFi lets SmartSpin2k download firmware updates and gives compatible training apps a faster connection.
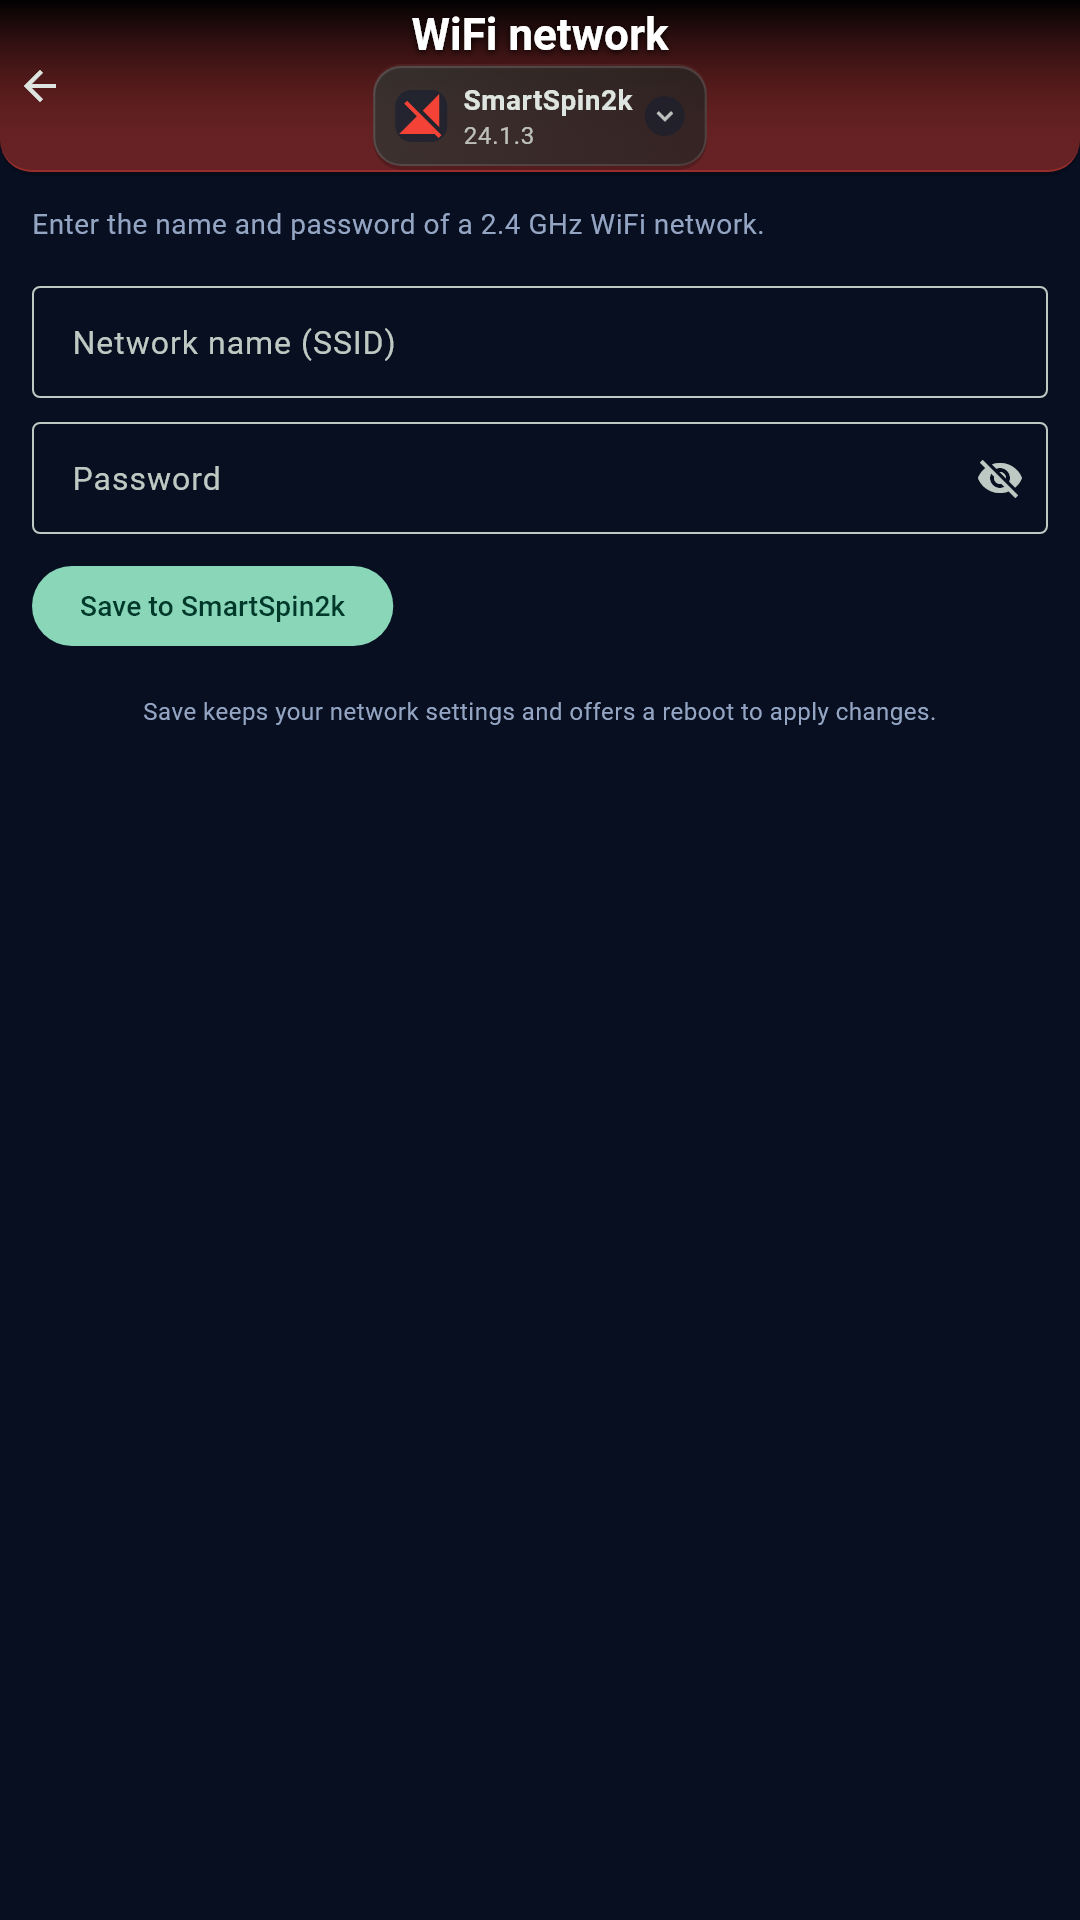
- On Device, tap Settings, Network, then WiFi network.
- Enter the Network name (SSID) and Password of a 2.4 GHz network.
- Tap Save to SmartSpin2k, then tap Reboot now in the Reboot SmartSpin2k? dialog.
Part 8 · Your first ride
- Close other apps. Only one app can control the SmartSpin2k at a time. Quit other training apps before you start.
- Plug in your SmartSpin2k. The status light comes on.
- Wake your bike.Wake your power source. Pedal a few seconds. Your bikepower meter wakes and SmartSpin2k picks it up over Bluetooth.Tablet Mode: start a Just Ride on the Peloton tablet, or open Grupetto. Headless Mode: pedal a few seconds. With the tablet unplugged, the Peloton app cannot see your bike.Open Grupetto and check BLE TX is on, or pedal to wake your pedals. Pedal a few seconds. Grupetto or your pedals show live cadence and power.
- Pair SmartSpin2k in your training app. Pick SmartSpin2k for Power, Smart Trainer or Controllable, Cadence, and Heart rate if you paired a monitor through it. See pairing steps.
- Calibration is optional, and needs Grupetto. The Bike+ knob has no end stops, so SmartSpin2k calibrates from the resistance Grupetto sends. With power meter pedals alone, skip it. See Calibration.Calibration is optional. SmartSpin2k rides fine without it. Run it once to save your knob’s range and keep the ERG Power Table between rides. See Calibration.
Every ride: plug in, pedal a few seconds, then open your training app.