Peloton Setup for SmartSpin2k
Use this guide to choose and configure the operating mode for your Peloton bike with the SmartSpin2k device. Select a mode based on how you wish to interact with your Peloton and SmartSpin2k.
Table of Contents
Instructional Video
Choosing Your Operating Mode
Peloton Bike users have three options for using SmartSpin2k, each offering unique features and setup requirements:
- Tablet Mode: Ideal for those who use Peloton’s digital services directly on the bike’s tablet.
- Headless Mode: Suitable for users who prefer using third-party apps and do not use Peloton’s digital services.
- Bluetooth Mode: For users with power meter pedals.
Select the mode that aligns with your usage preferences, and follow the setup instructions below for your chosen mode.
Peloton Bike+ owners need a power meter for compatibility with SmartSpin2k.
Tablet Mode Setup
Expand to view Tablet Mode setup instructions
-
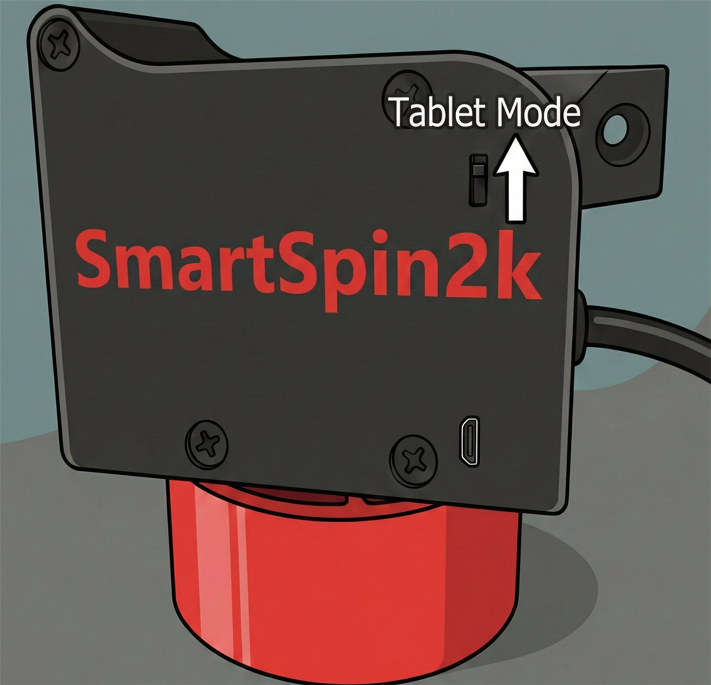
Set SmartSpin2k to Tablet Mode: Flip the switch on the side of your SmartSpin2k device up, towards the tablet.

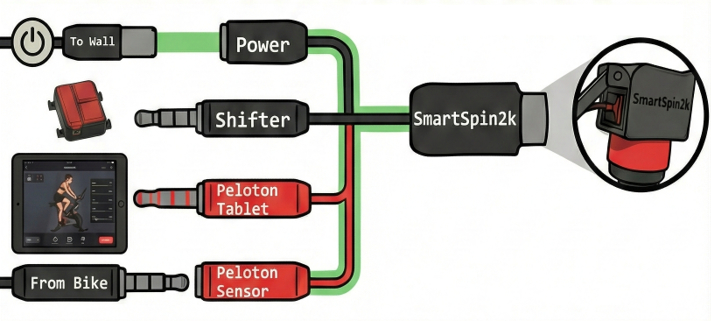
- Connect the breakout cable directly to your sensor as well as to the back of the tablet.

- Power On: Ensure the Peloton Bike Tablet is turned on and logged into your account.
- Select Workout: Start a workout or free ride in the Peloton app to activate the bike.
- Connect to Apps: Use the following guide to connect SmartSpin2k with apps like Zwift. Riding Zwift with SmartSpin2k
Headless Mode Setup
Expand to view Headless Mode setup instructions
-
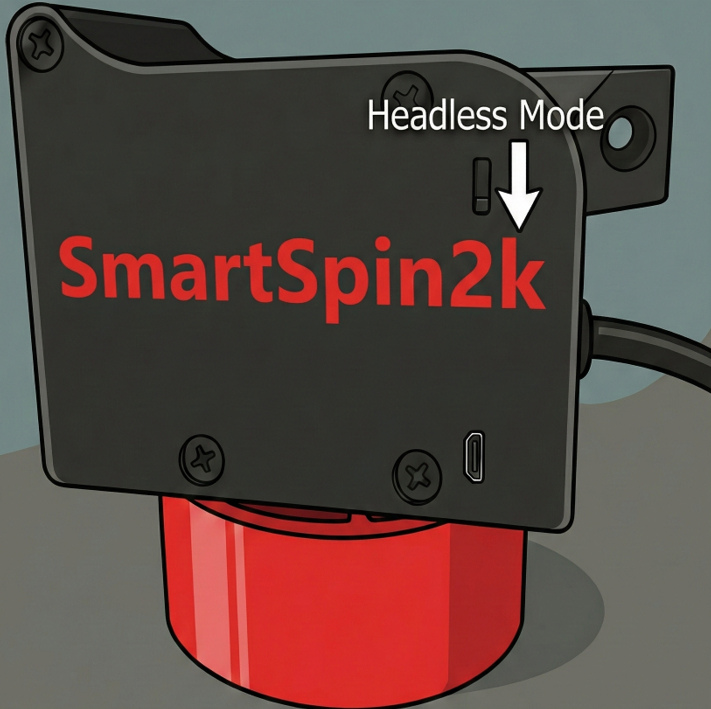
Switch to Headless Mode: Flip the switch on the side of your SmartSpin2k device down, towards the bike or ground.

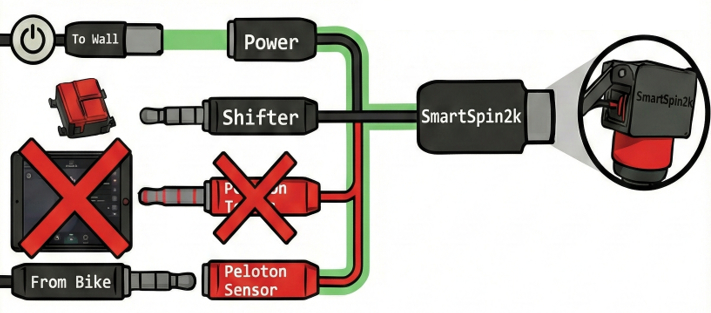
- Connect the breakout cable to your bike’s sensor. Ensure the Peloton Tablet connector is disconnected from the tablet.

-
Connect to Apps: Use the following guide to connect SmartSpin2k with apps like Zwift. Riding Zwift with SmartSpin2k
Important Reminder
Remember to switch back to Tablet Mode if you want to use any Peloton services after using this mode.
Bluetooth Setup
Follow the First Ride Instructions if you are using a bluetooth power meter with your Peloton Bike or Bike+.